VPS小技能 | 如何制作Linux DD包
为什么需要自己制作VPS DD包?
- 洁癖VPS使用者
- 方便加密整个磁盘
- 预设所需服务,DD后自动运行,免去繁琐的配置
需要准备
- VirtualBox (示例版本 7.0.6 r155176 (Qt5.15.2))
- Linux ISO (本文示例基于openSUSE)
- VPS
02x01.在VirtualBox中安装openSUSE
03x01.创建openSUSE虚拟机
- 新建虚拟电脑,打开专家模式
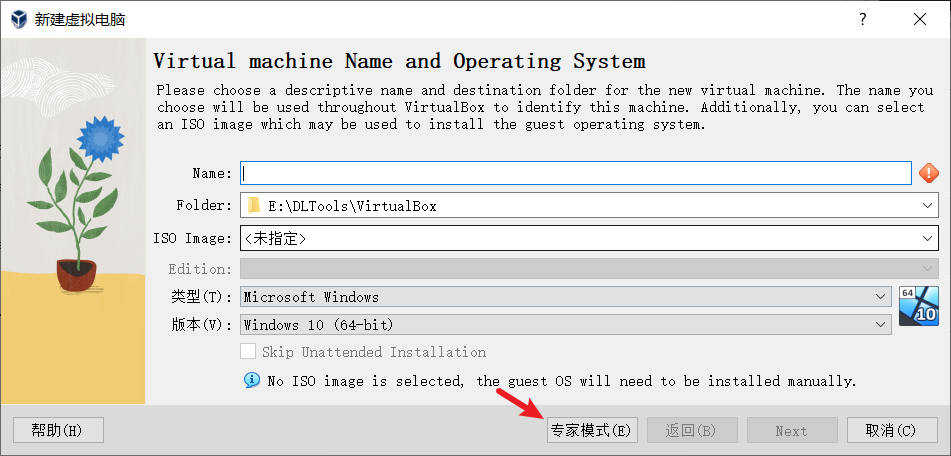
- 第一项需要设置以下内容
- 虚拟机名称
- 存放路径
- ISO 位置
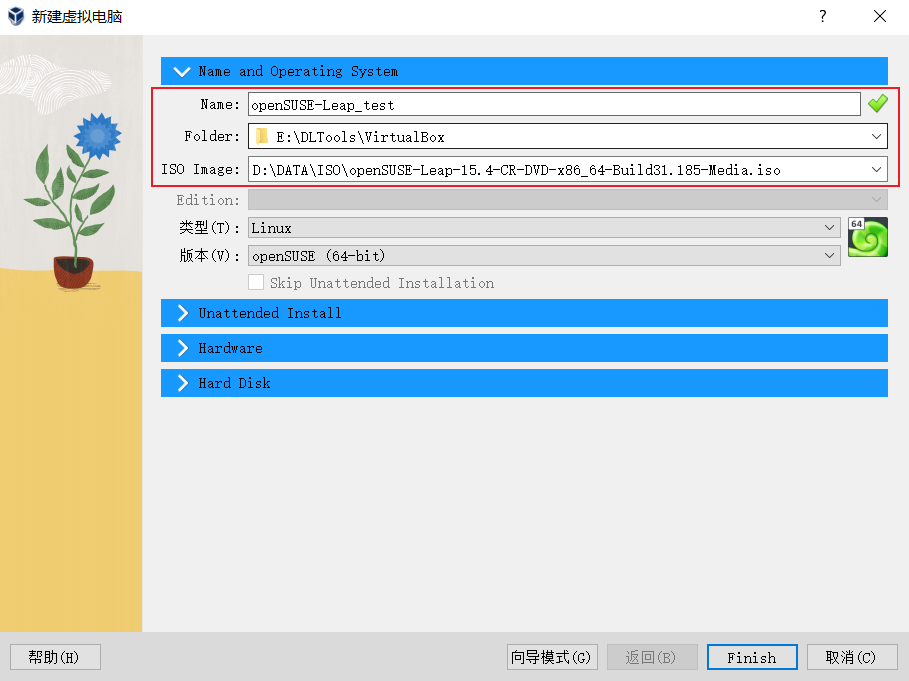
- 跳过第二项,第三项设置虚拟机规格(此处根据宿主机配置随意设置,但注意不能过小)
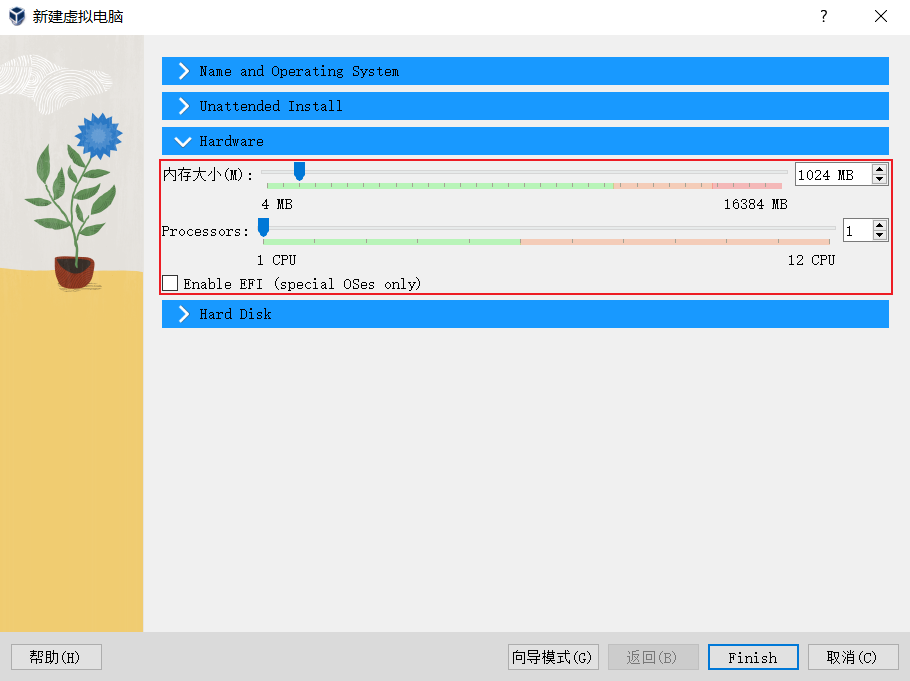
- 第四项有三点需要注意
- 虚拟磁盘类型选择VHD
- 注意必须勾选分配完整磁盘空间
- 虚拟磁盘大小有有两种选择
- 留有正常安装空间(如果需要配置各项服务,可以适当扩容),后期根据VPS大小扩容磁盘,可适用于大多数VPS厂商配置
- 根据VPS磁盘大小选择(注意不能超过VPS磁盘大小,建议小个0.5G左右即可),后期不兼容比此项小的VPS磁盘容量
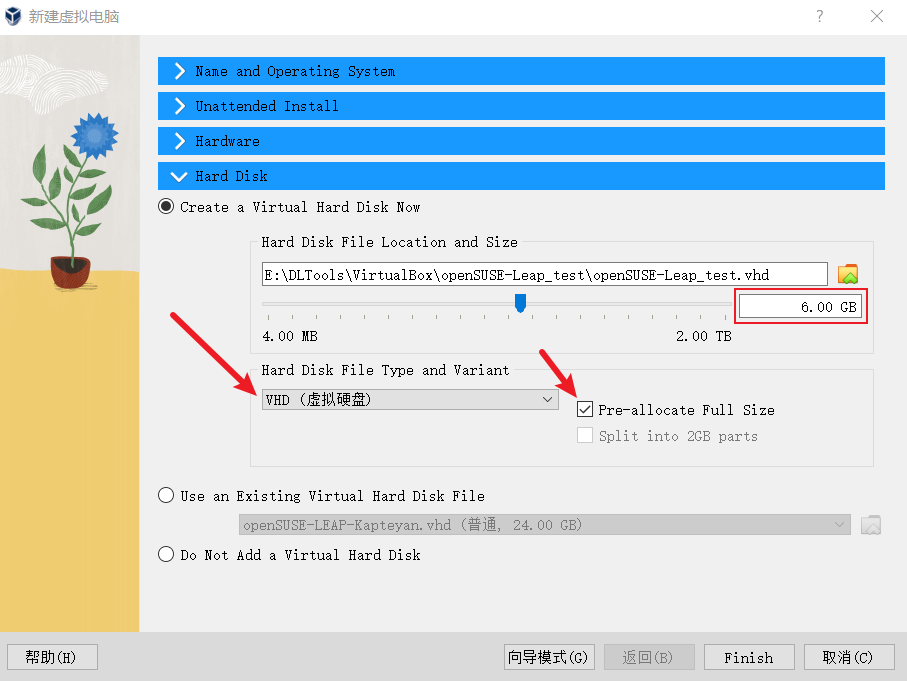
这里用于测试的VPS厂商磁盘大小为15G 我这里设置虚拟磁盘大小为6G 后期将演示如何扩容磁盘
- 确认没问题后点击完成即可,界面看起来大概是这样
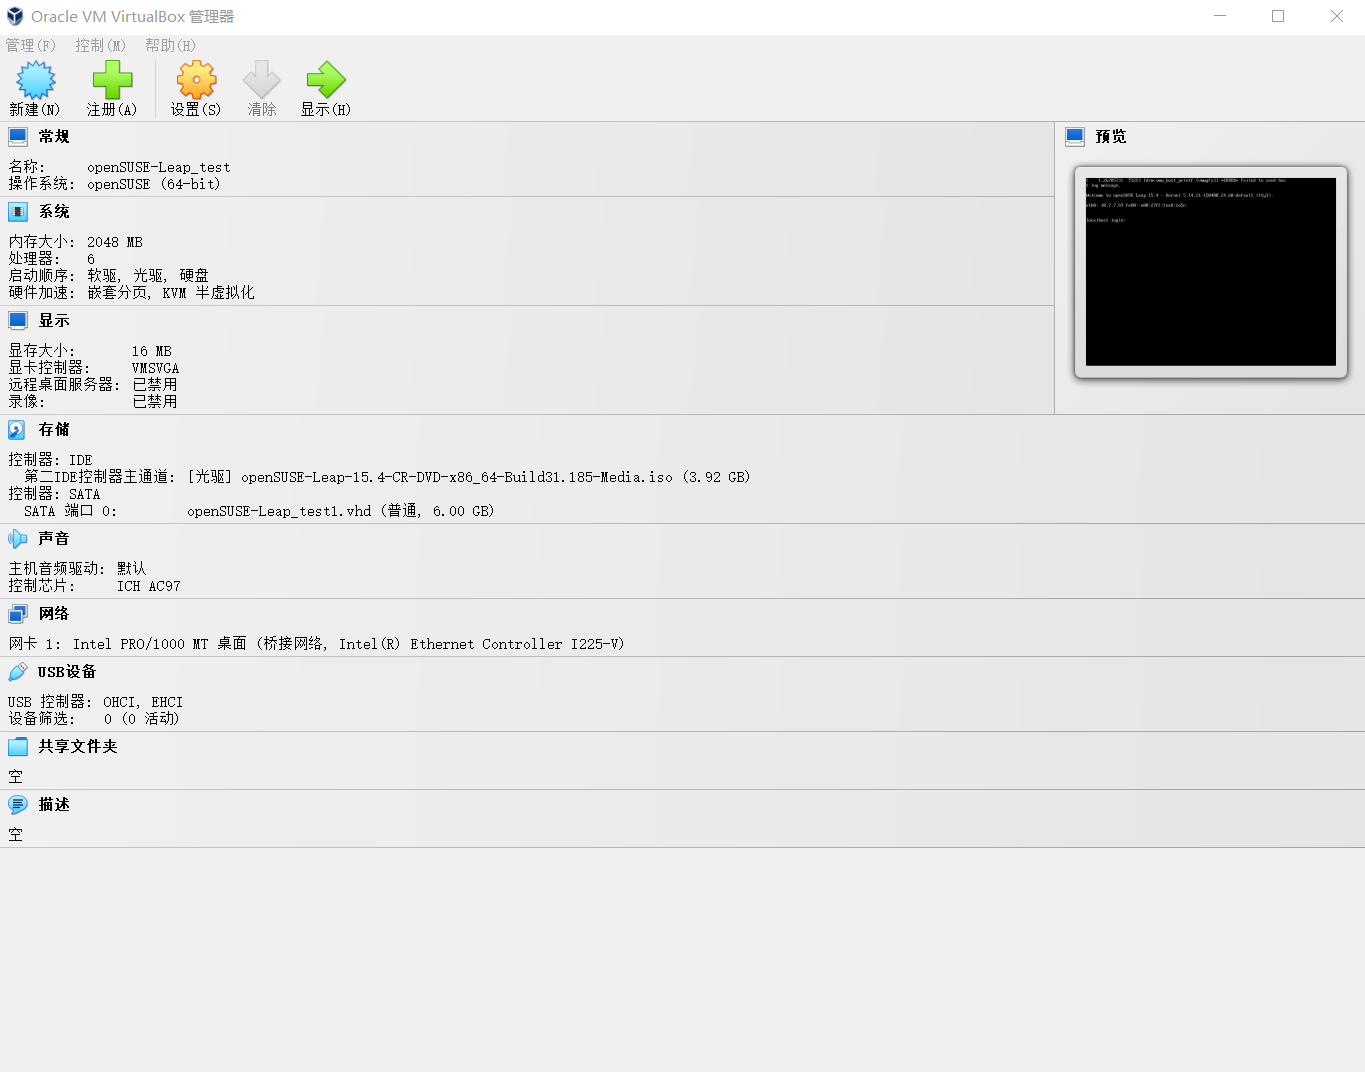
- 我们为了安装完成后便于SSH到服务器进行操作,这里我们将网络类型设置为桥接模式
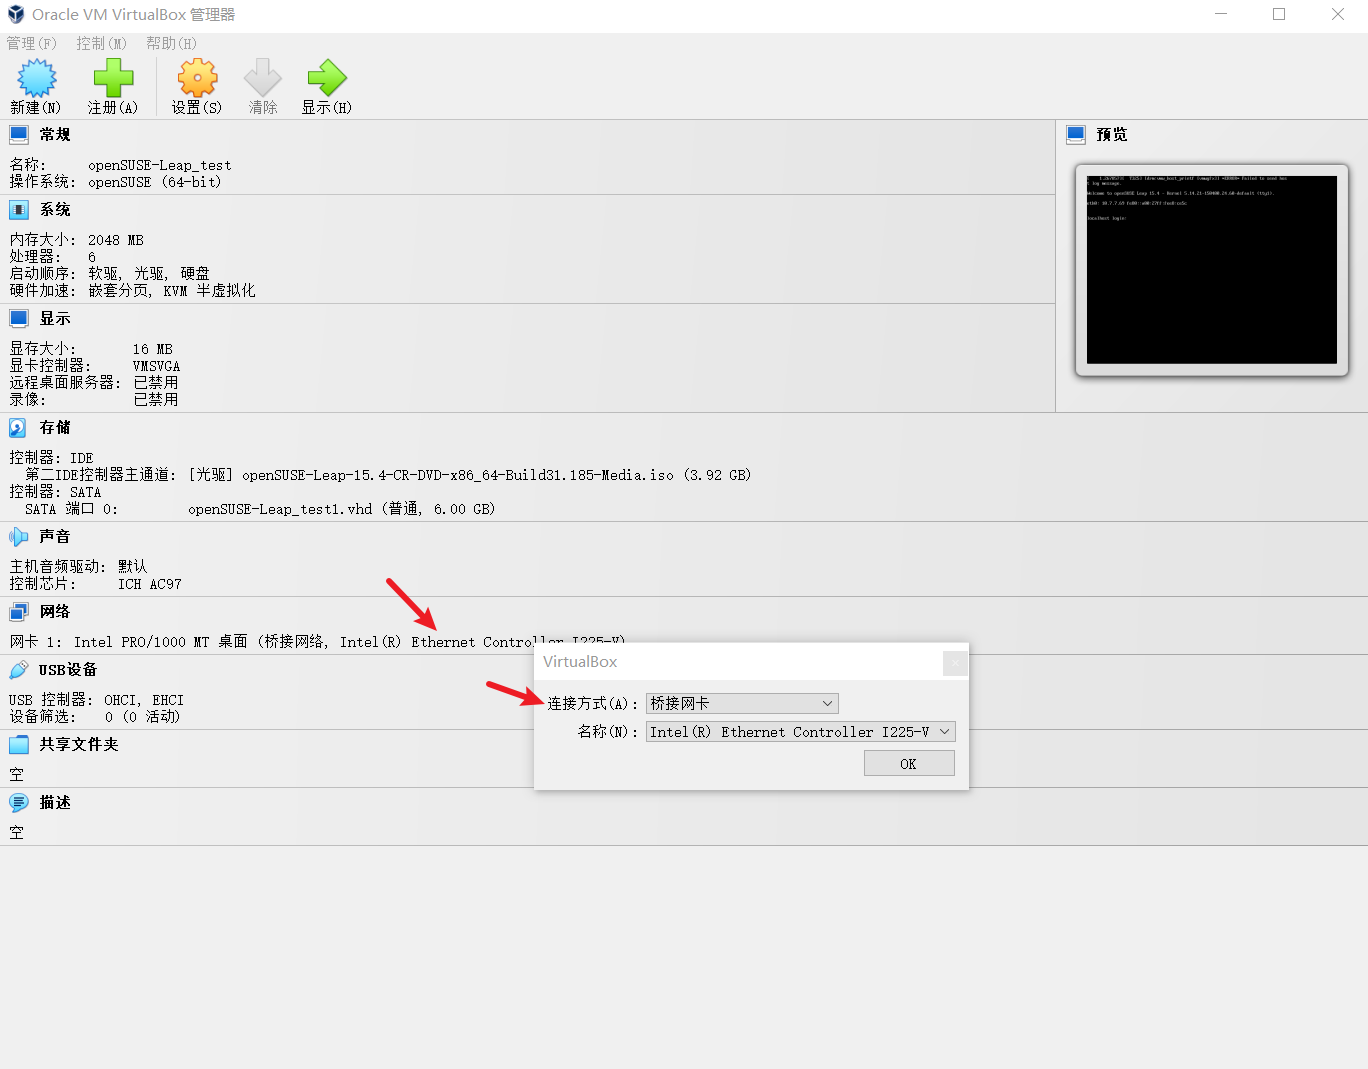
03x02.启动虚拟机,开始安装步骤
04x01.语言&键盘布局&仓库&GUI选项
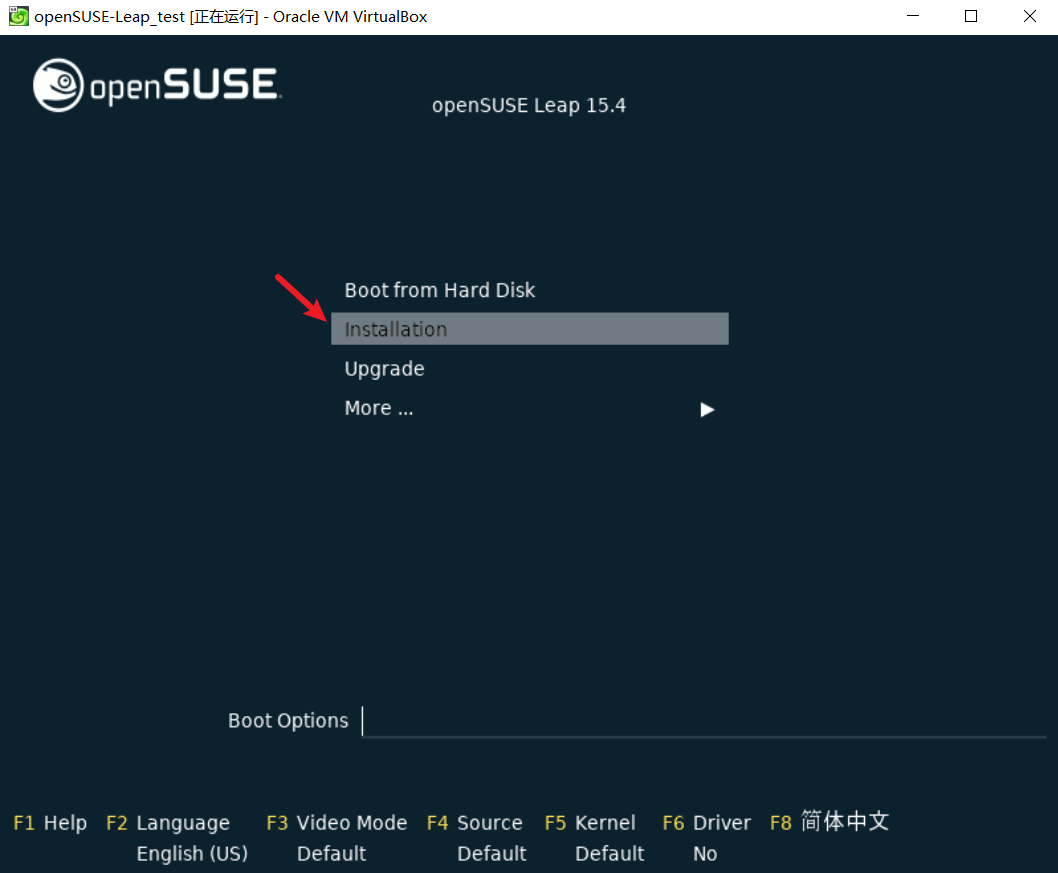
- 启动后选择Installation项后回车,开启安装流程
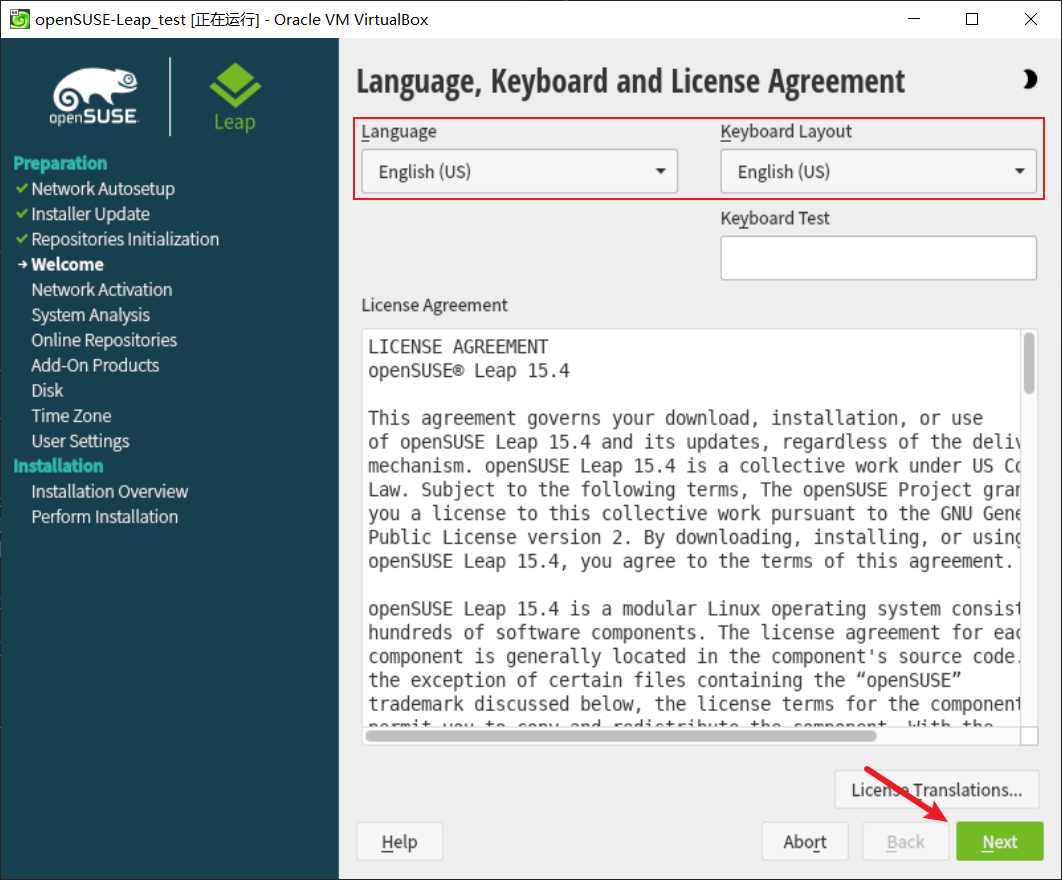
- 选择语言&键盘布局后点击Next进入下一项
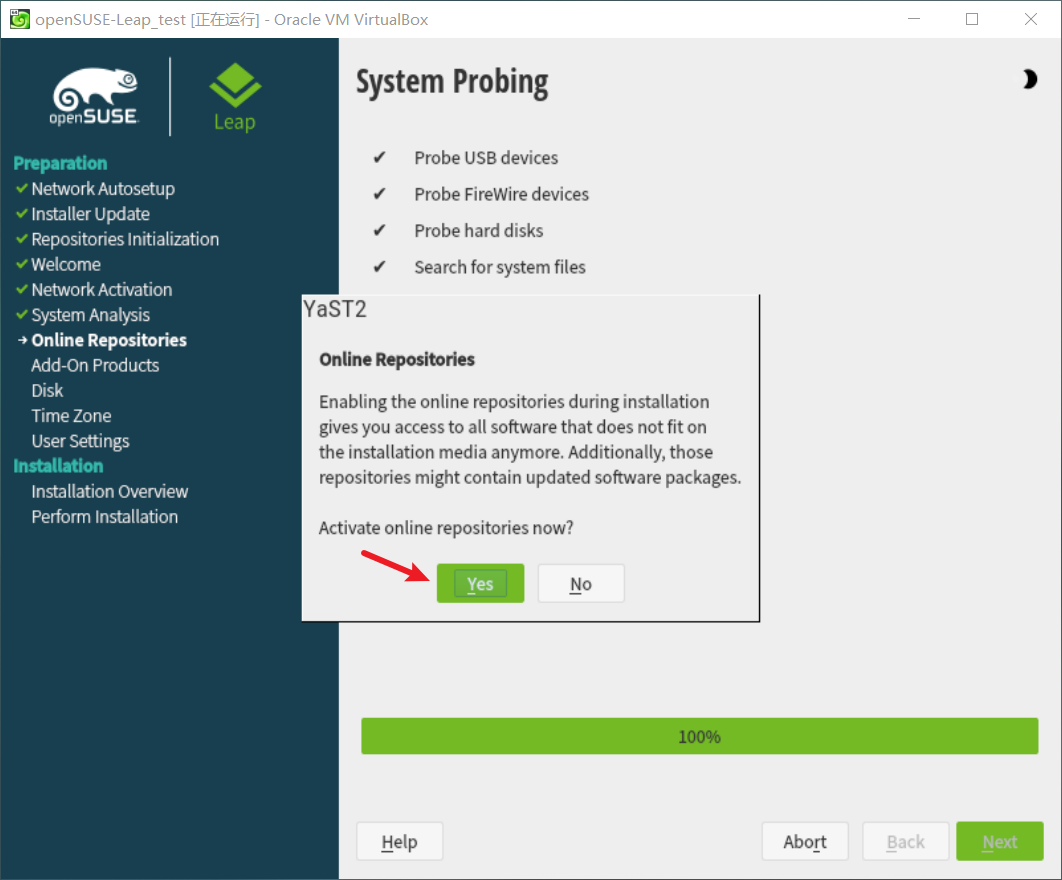
- 选择连接Online Rep以便自动更新ISO内置包
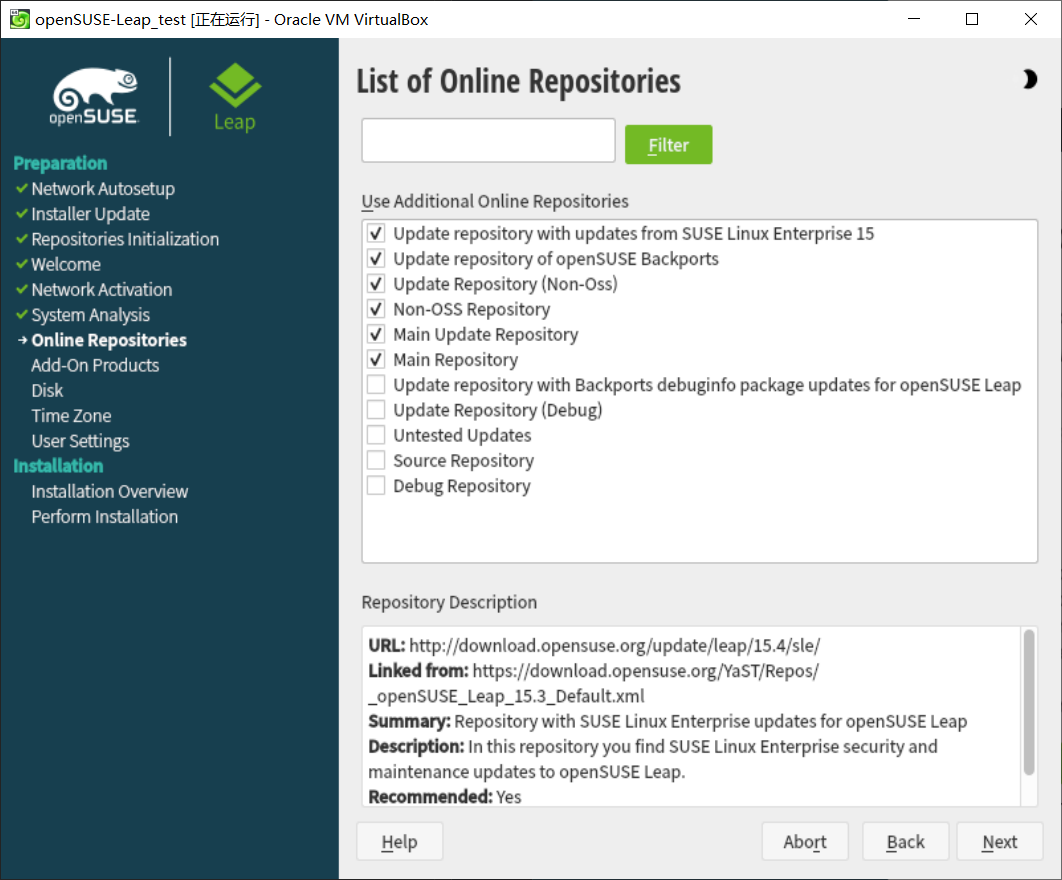
- 选择仓库,这一项保持默认即可
- 选择Server (如果你需要安装GUI,请根据需要选择即可)
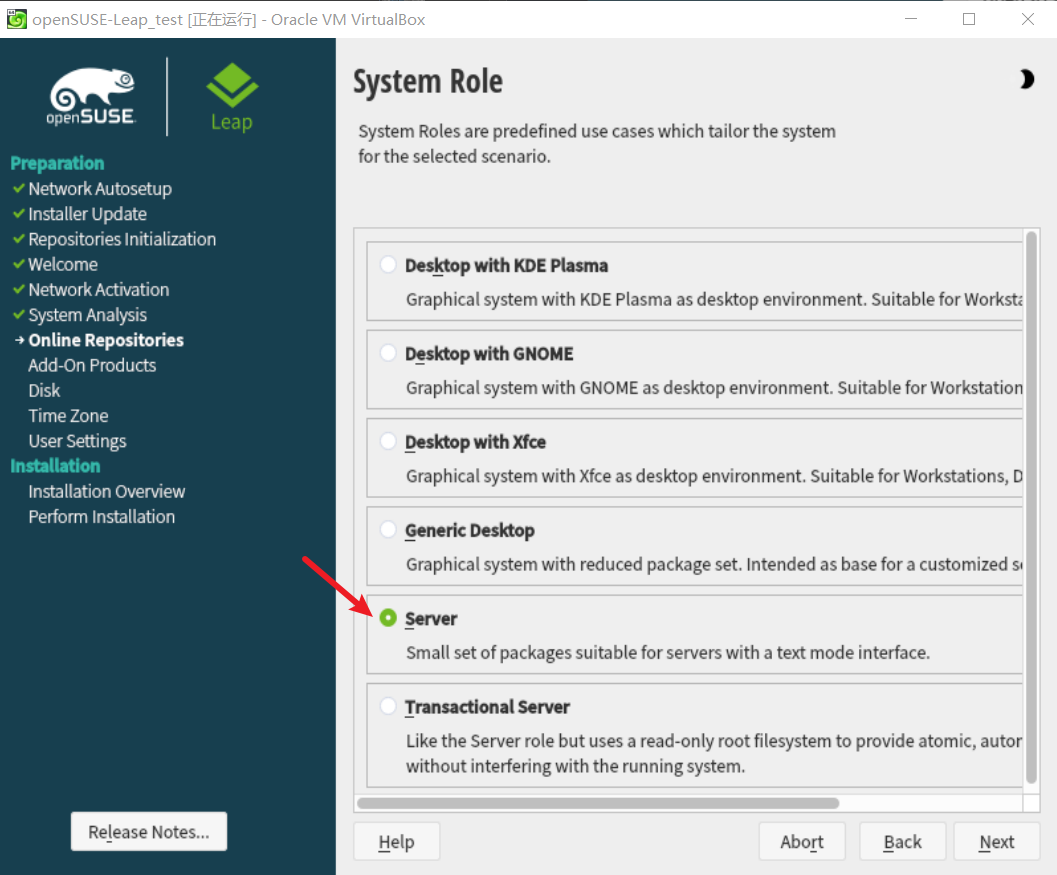
04x02.磁盘分区
- 磁盘分区我们选择专家分区并点击从现有分区开启
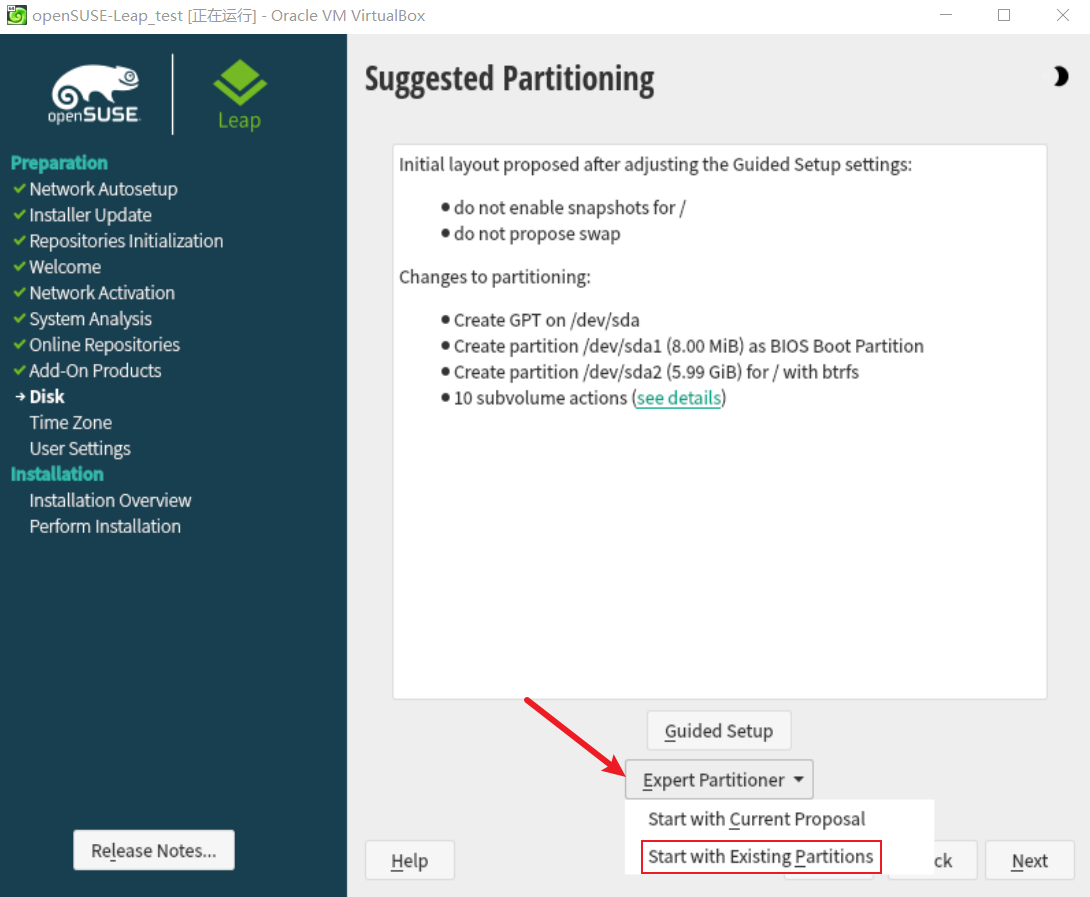
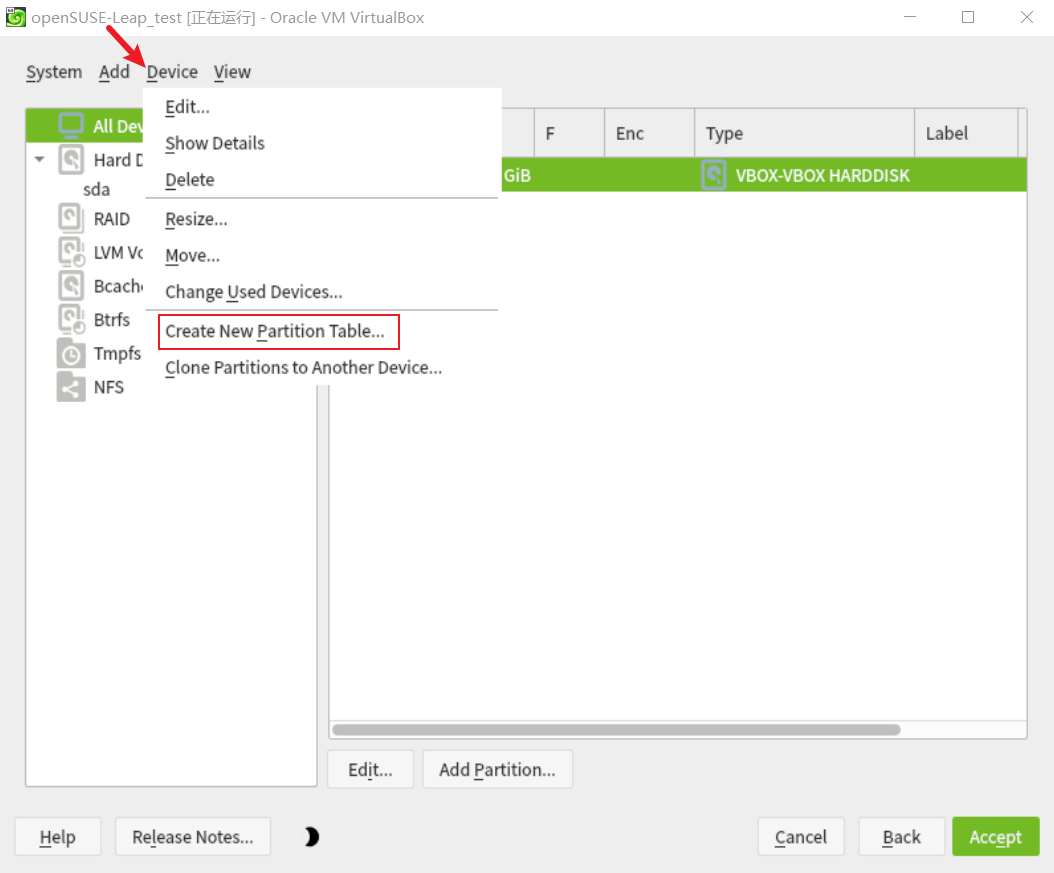
- 这一项我们单击导航中的Device,选择 Create New Partition Table (新建分区表)
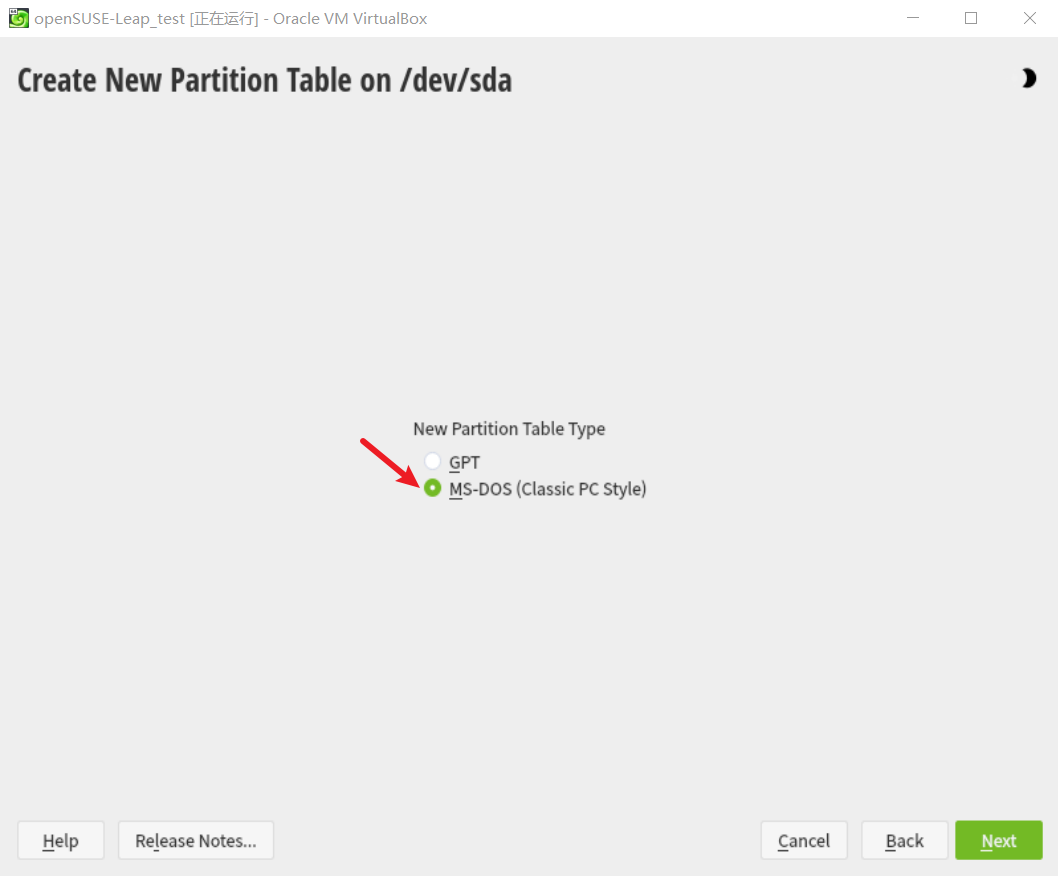
- 选择 MS-DOS 分区表 完成后点击Next
- 选中需要安装系统的磁盘,点击 Add Partition 开始分区
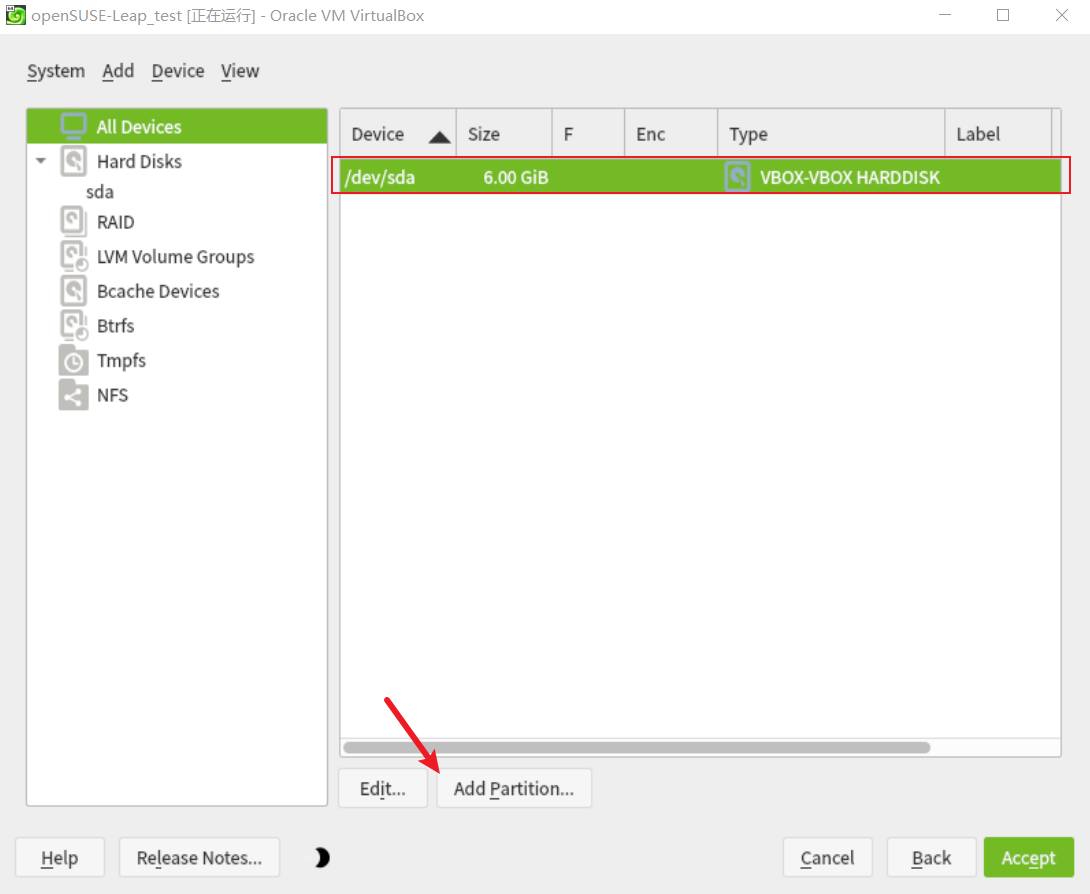
- 选择新建分区类型为 Primary Partition (主分区)
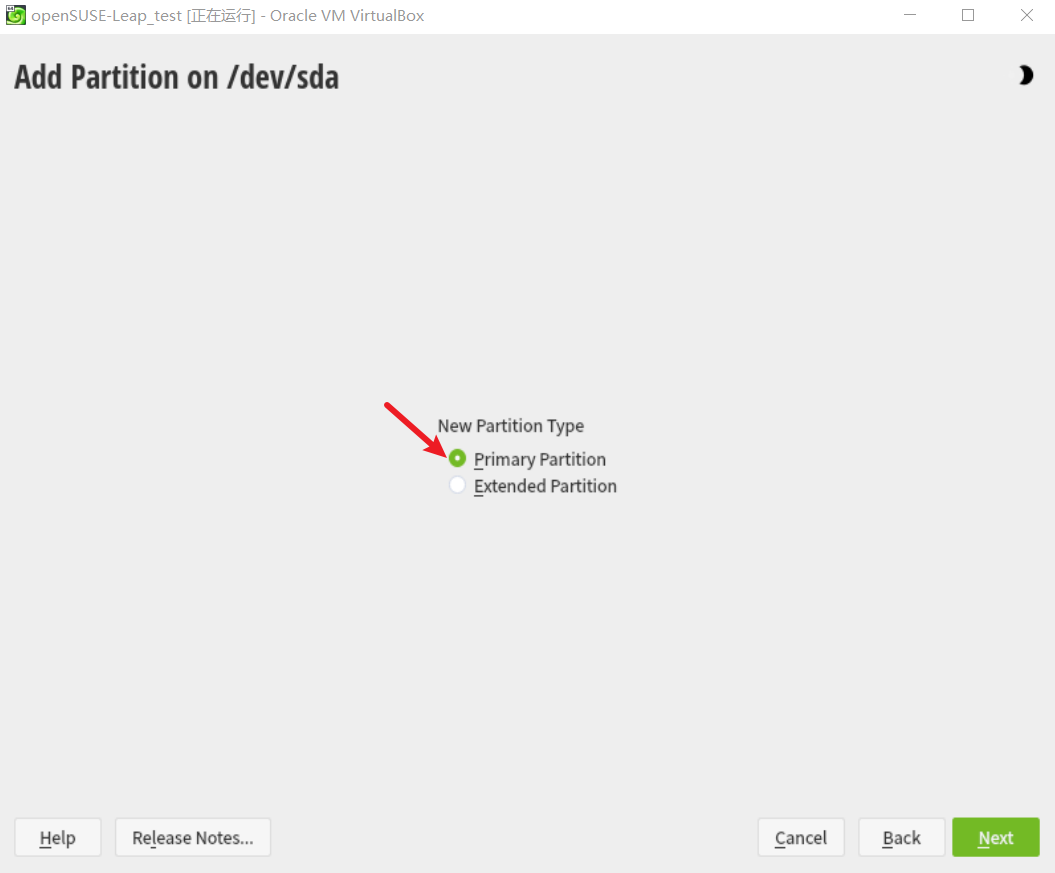
- 选择Custom Size并且将Size自定义为256MB 因为这是第一个分区,也就是 sda1 我们下一步将其挂载至boot下
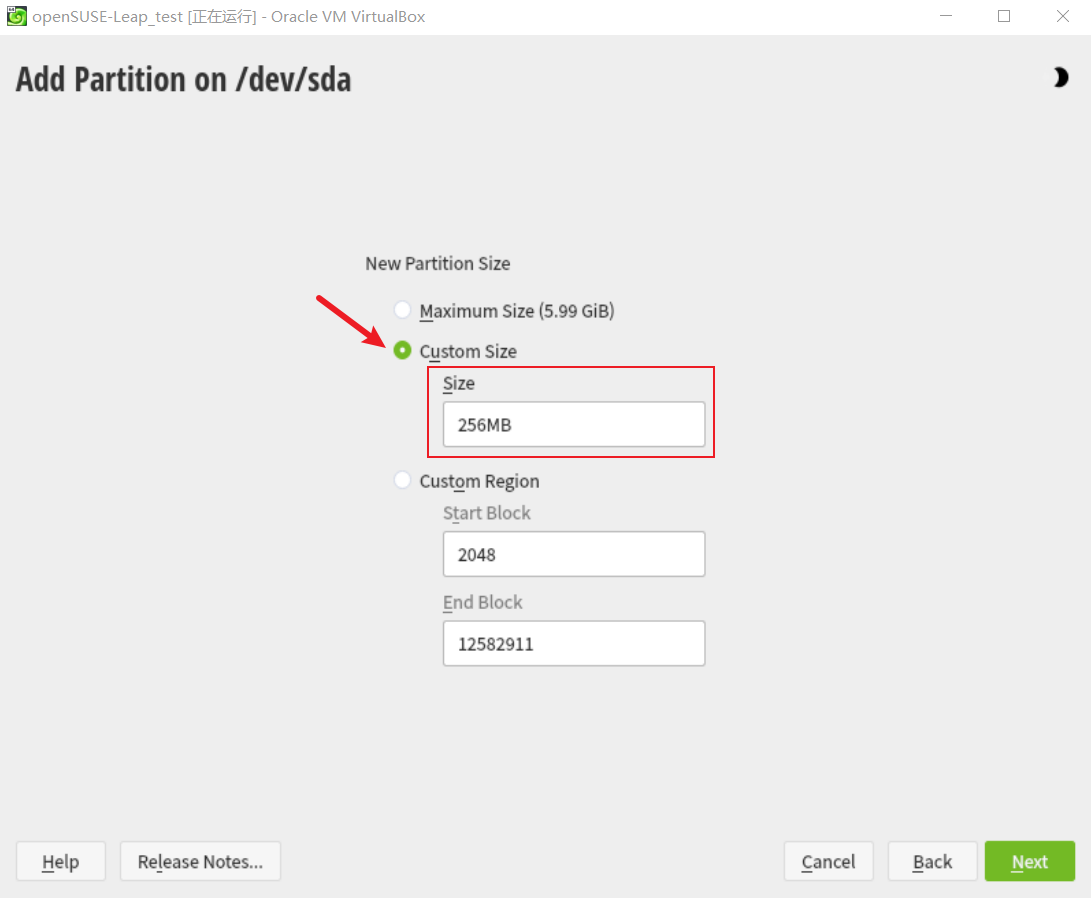
- 选择 EFI Boot Partition 以便安装程序下一步自动将分区文件类型定义为FTA
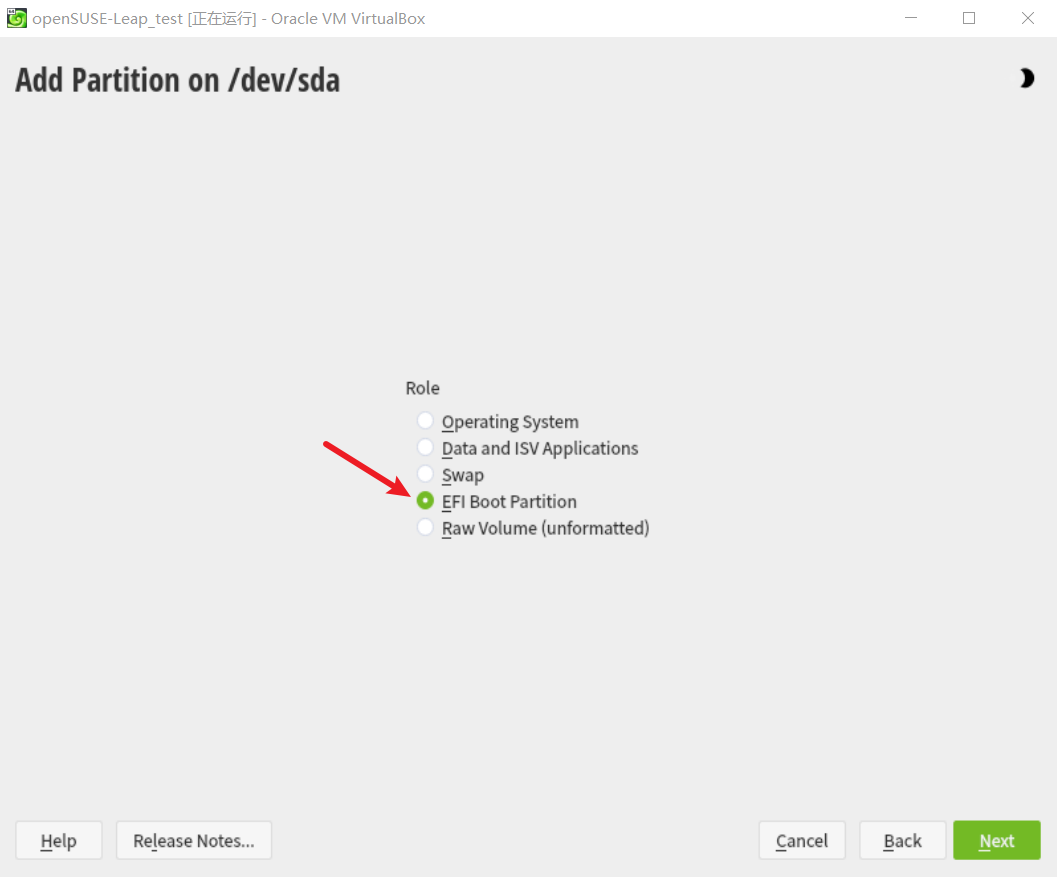
- 由于不通过EFI启动,所以我们将挂载点修改为boot,选择好以后点击Next
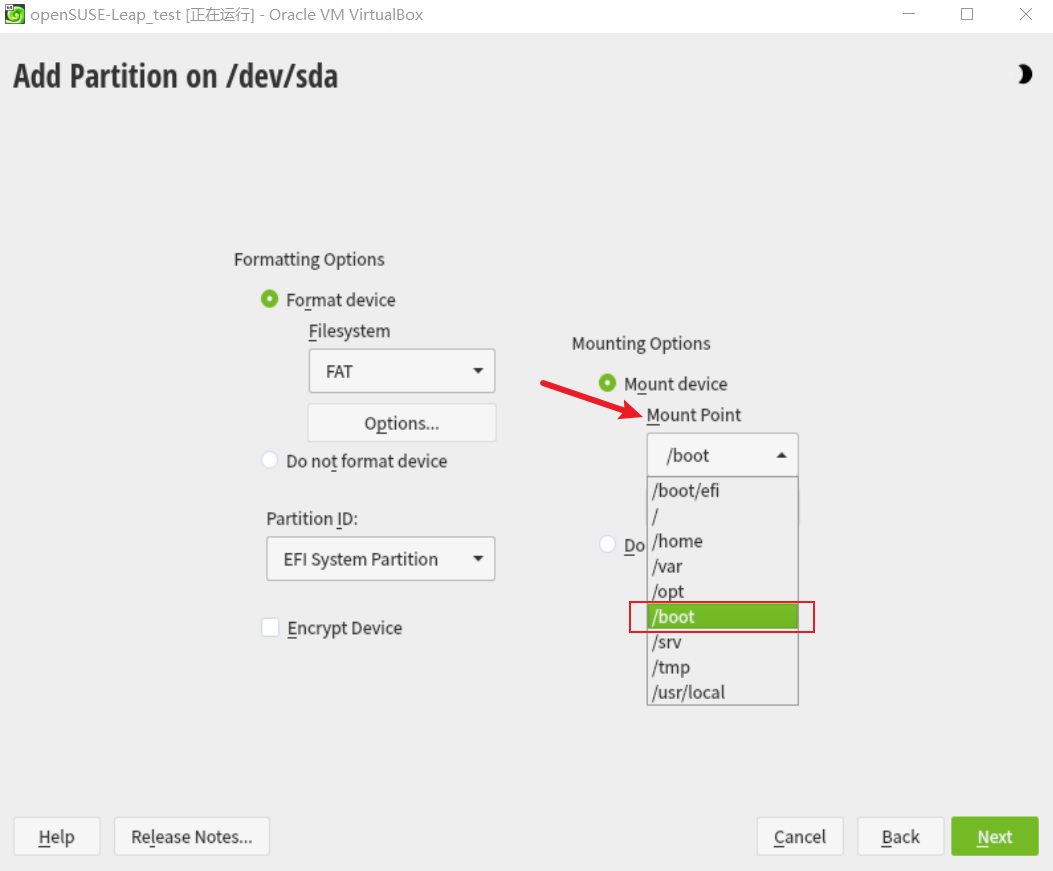
- 依旧选中刚才的硬盘,再次点击Add Partition 开始添加第二个分区
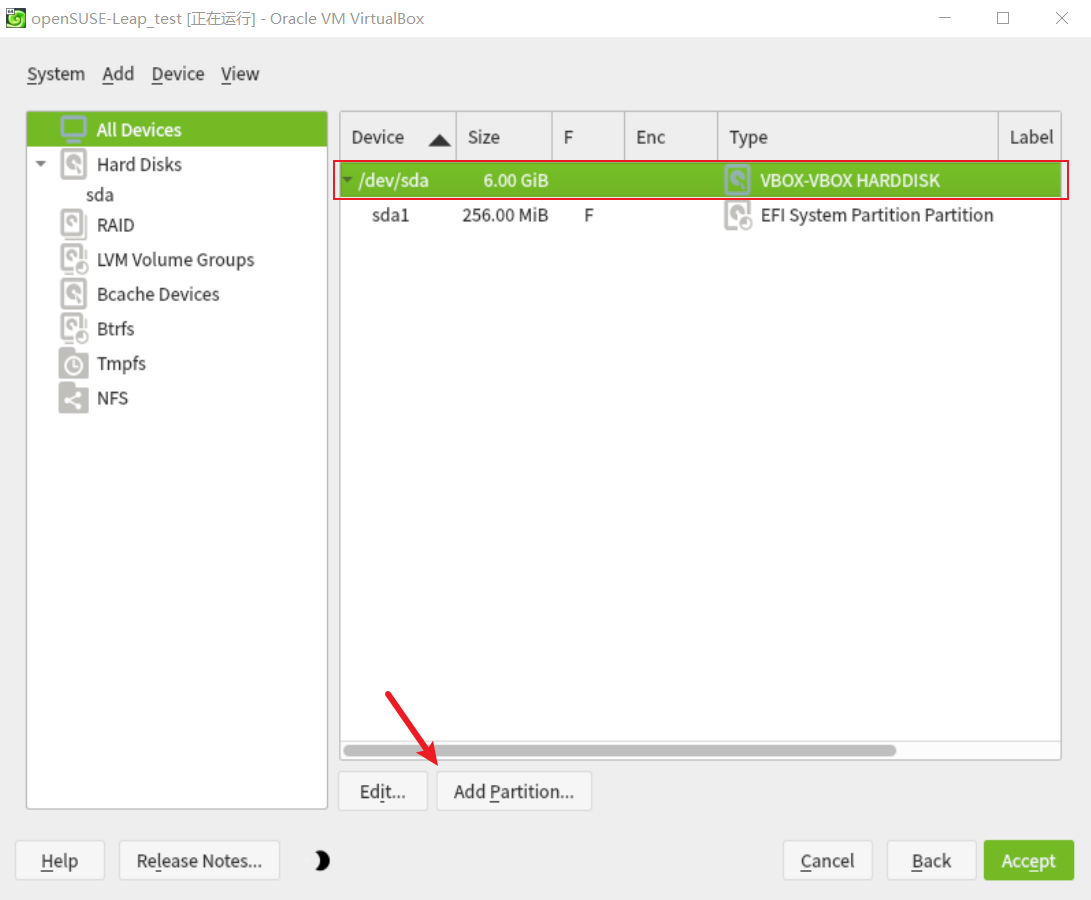
- 依旧选择新建分区类型为 Primary Partition (主分区)
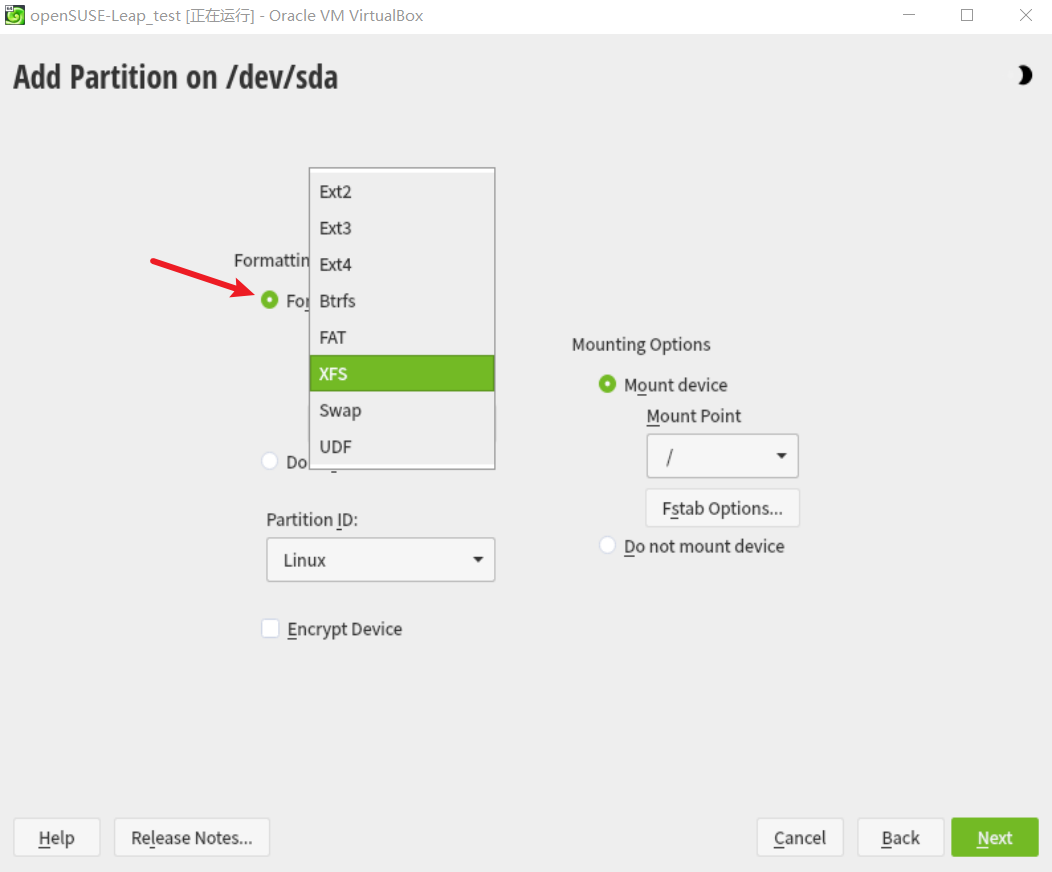
- 保持默认选项,即:将剩余空间全部划分至根分区(如果想要添加Swap分区,可以在此项编辑Swap大小)
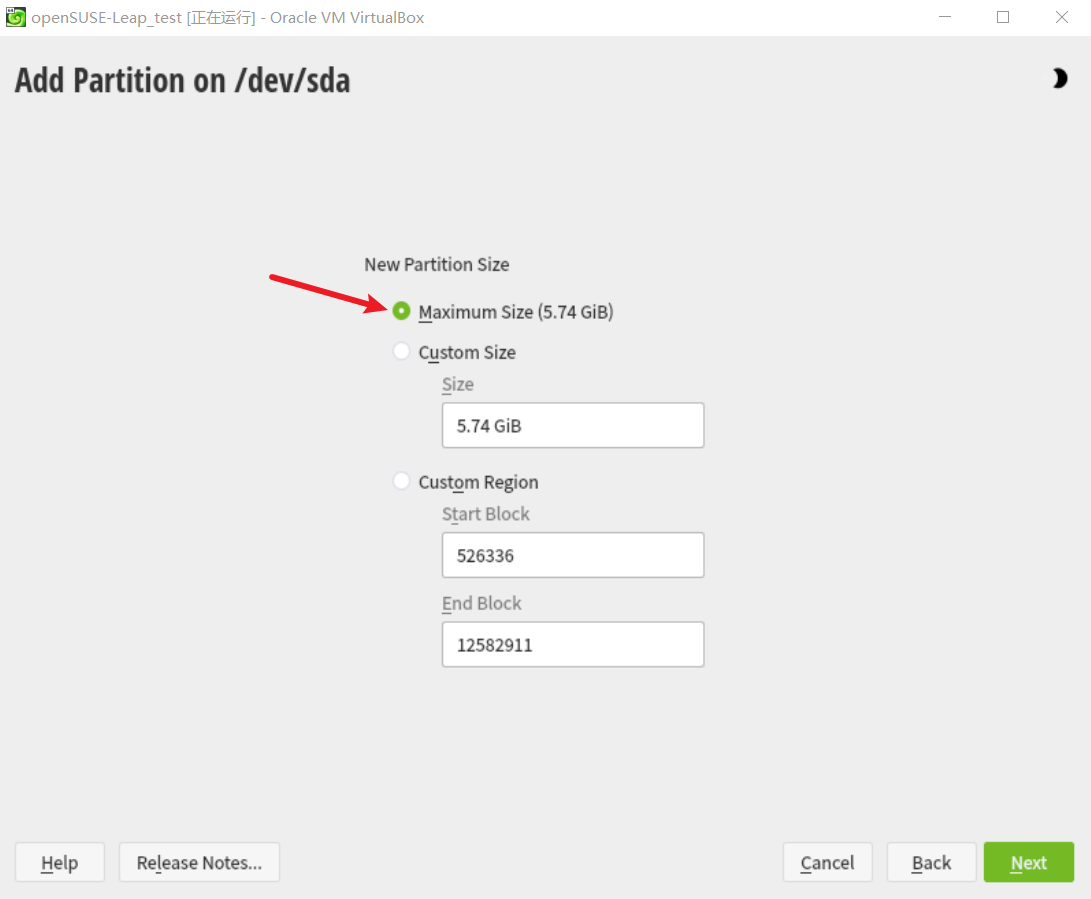
- 保持默认选项
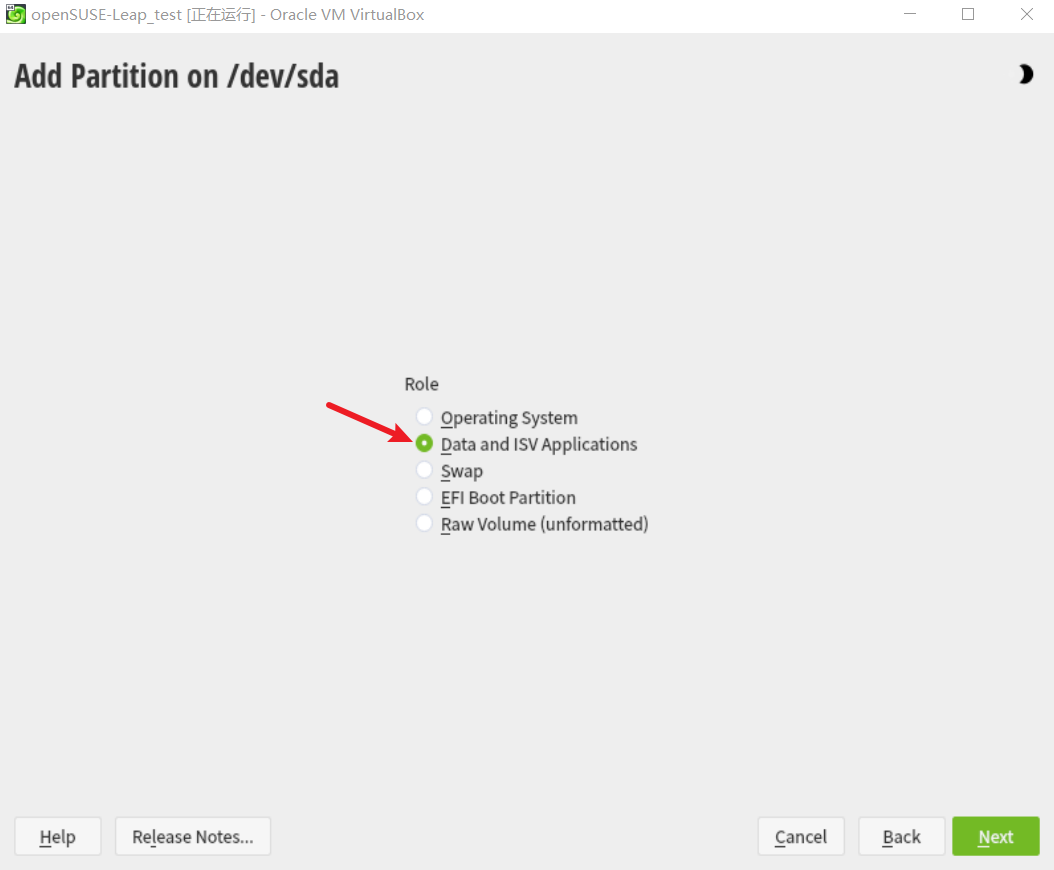
- 文件系统可以根据需要选择(我这里保持默认XFS),选择完成后点击Next
- XFS
- Ext4
- Btrfs
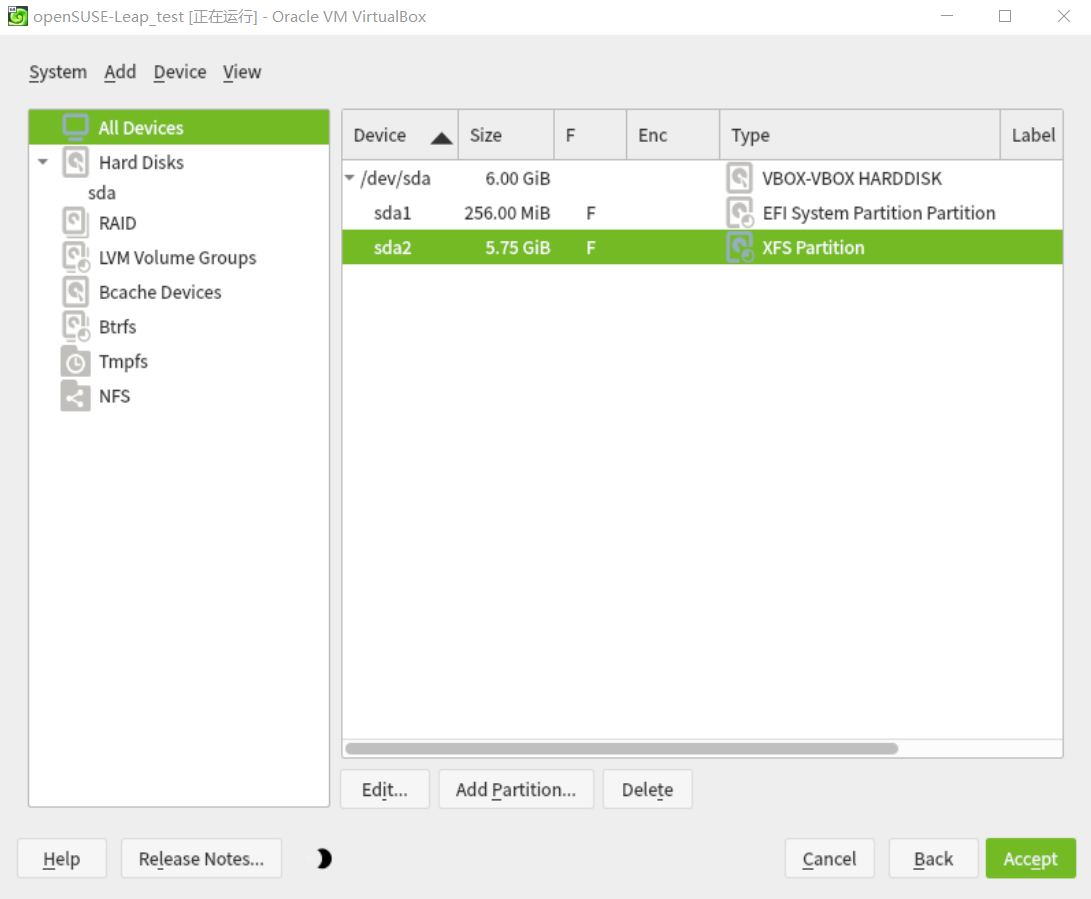
此时分区表类似于这样,如果没问题点击Accept
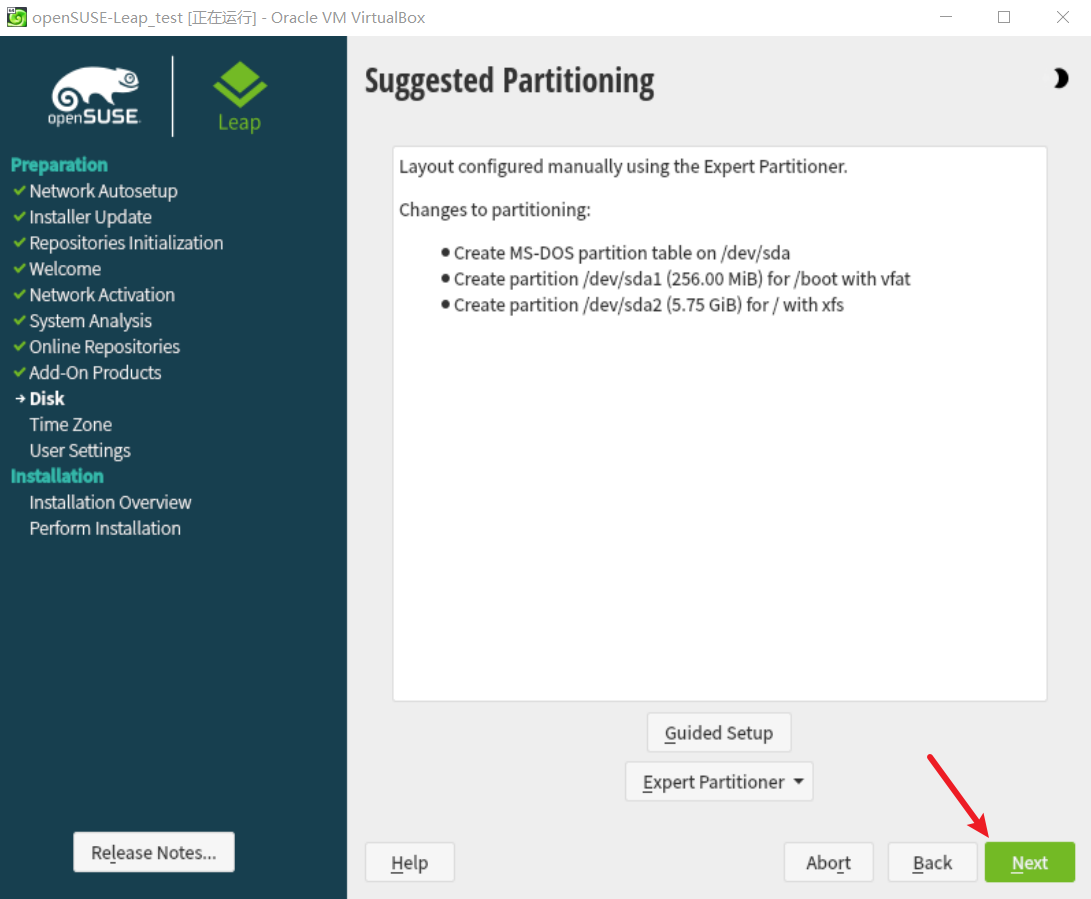
- 确认分区没问题后点击Next分区表类型必须为MS-DOS(MBR)
04x03.时区&ROOT密码配置
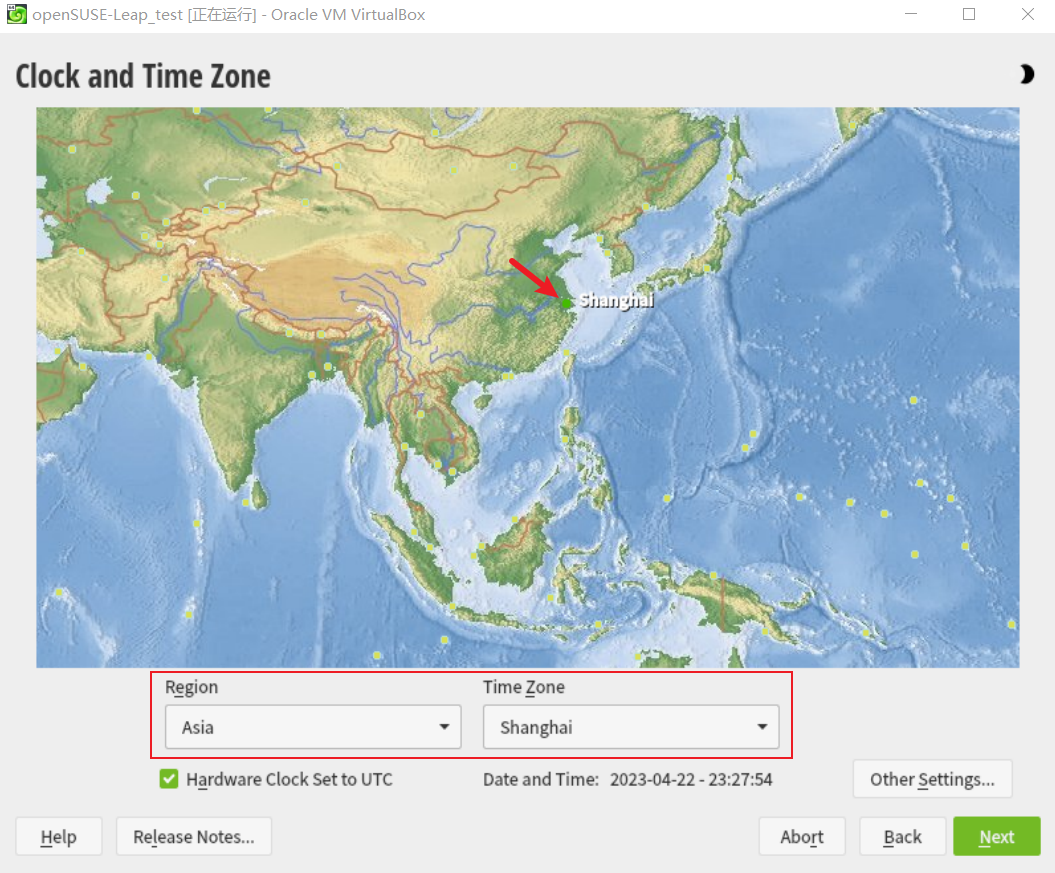
- 选择服务器时区,我这里选择Shanghai
- 此项让你选择是否添加用户(自由选择),我这里选择跳过(Skip User Creation),直接设置Root账户密码
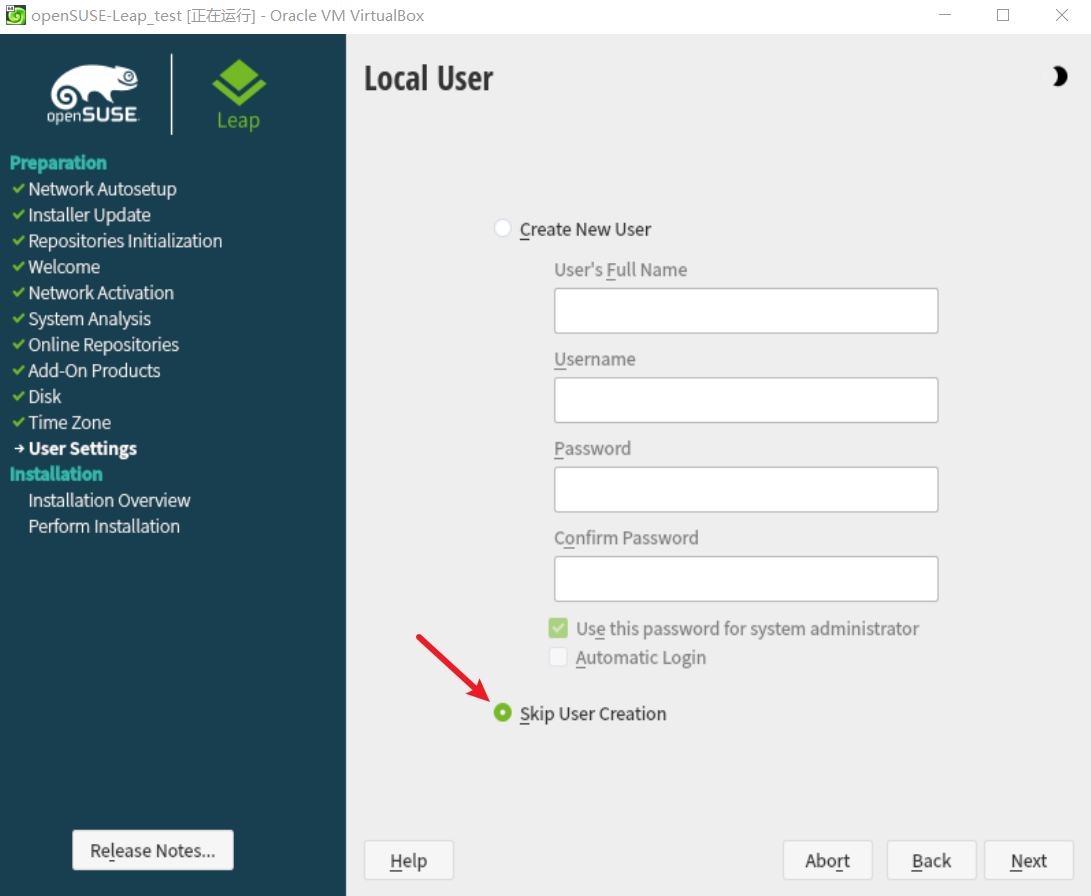
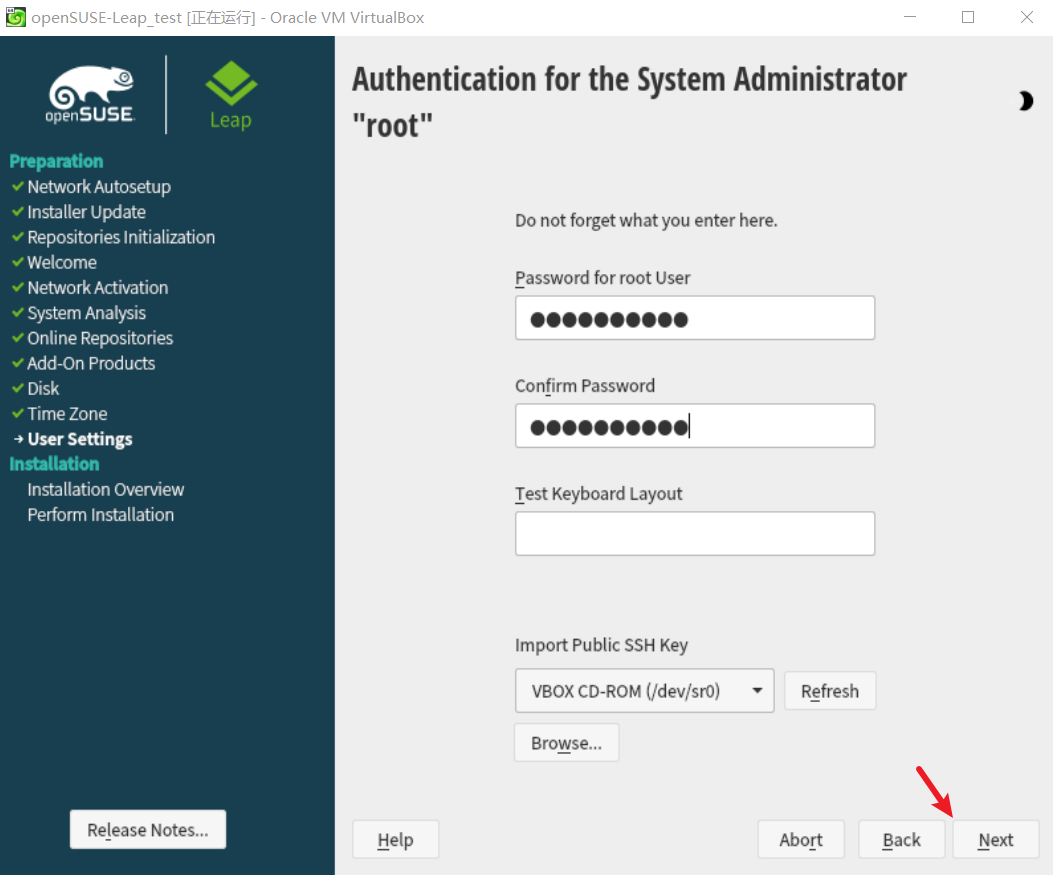
- 设置Root账户密码
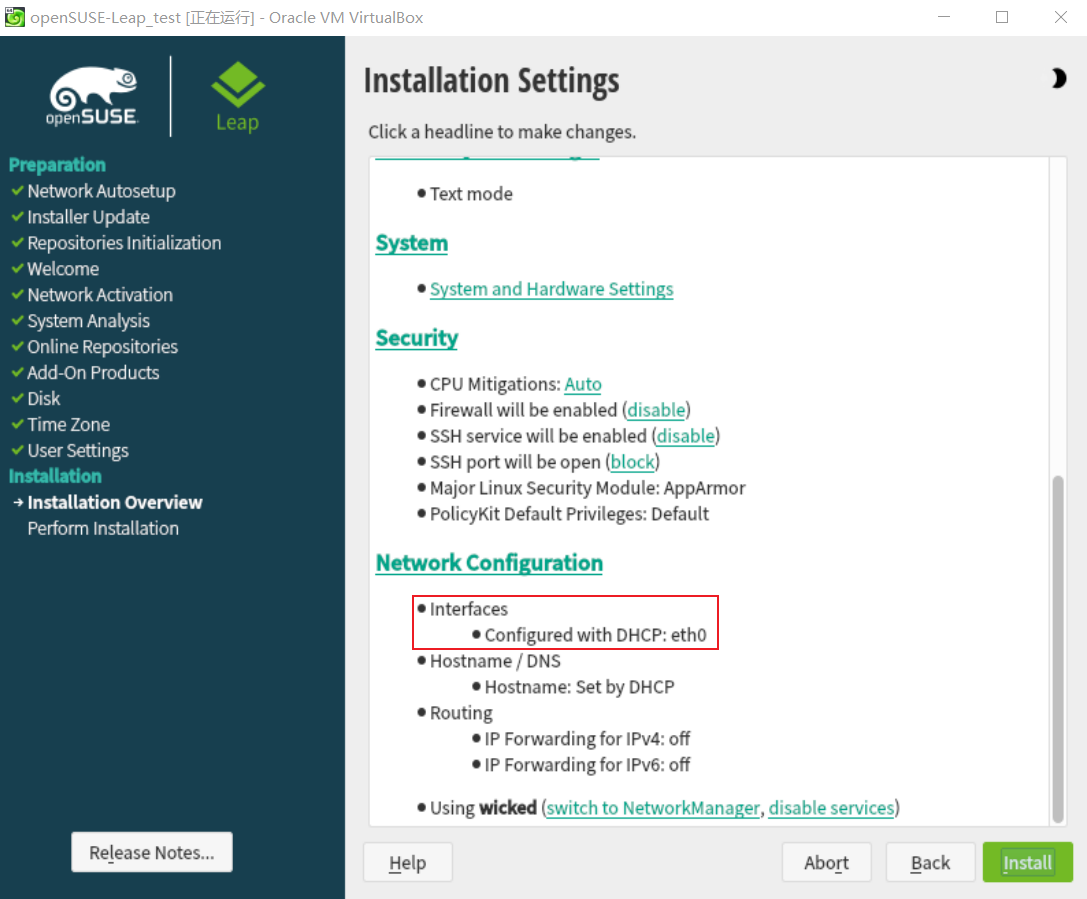
- 确认没问题后点击Install (需要确认网络接口名称为eth0)
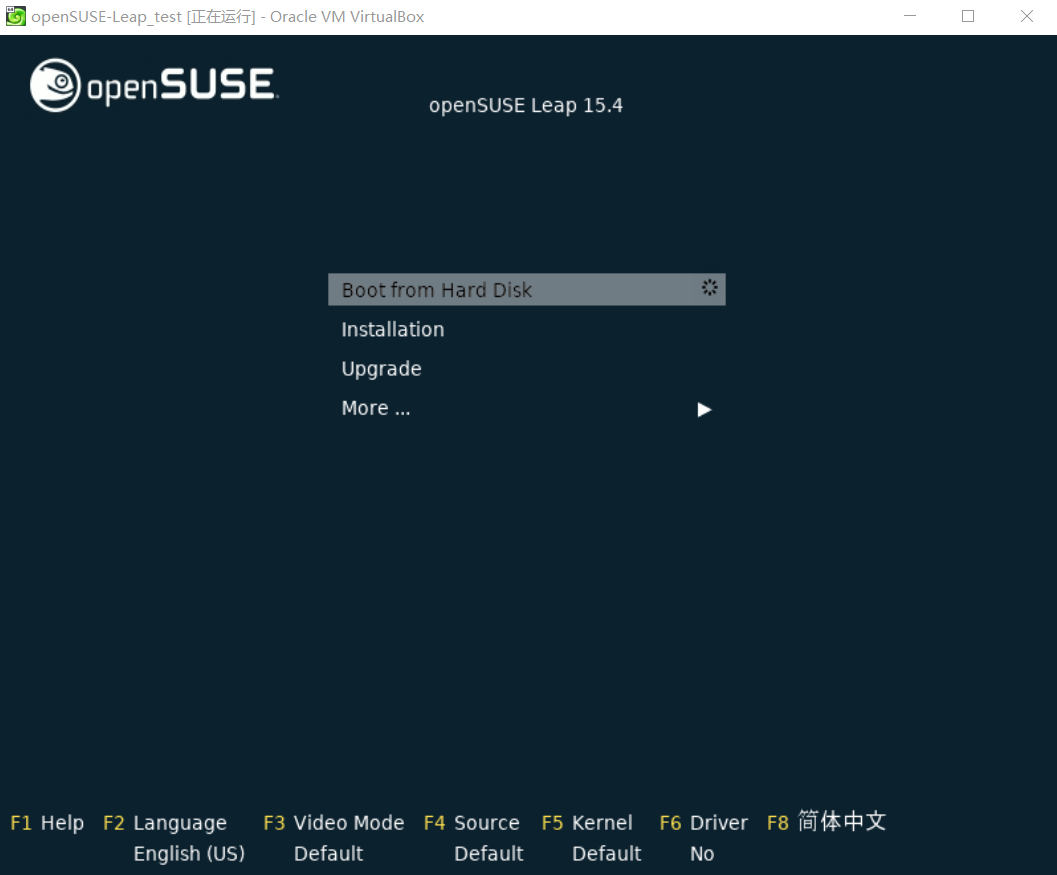
- 安装完成后会自动开机 再次开机后我们选择Boot from Hard Disk,从本地硬盘启动
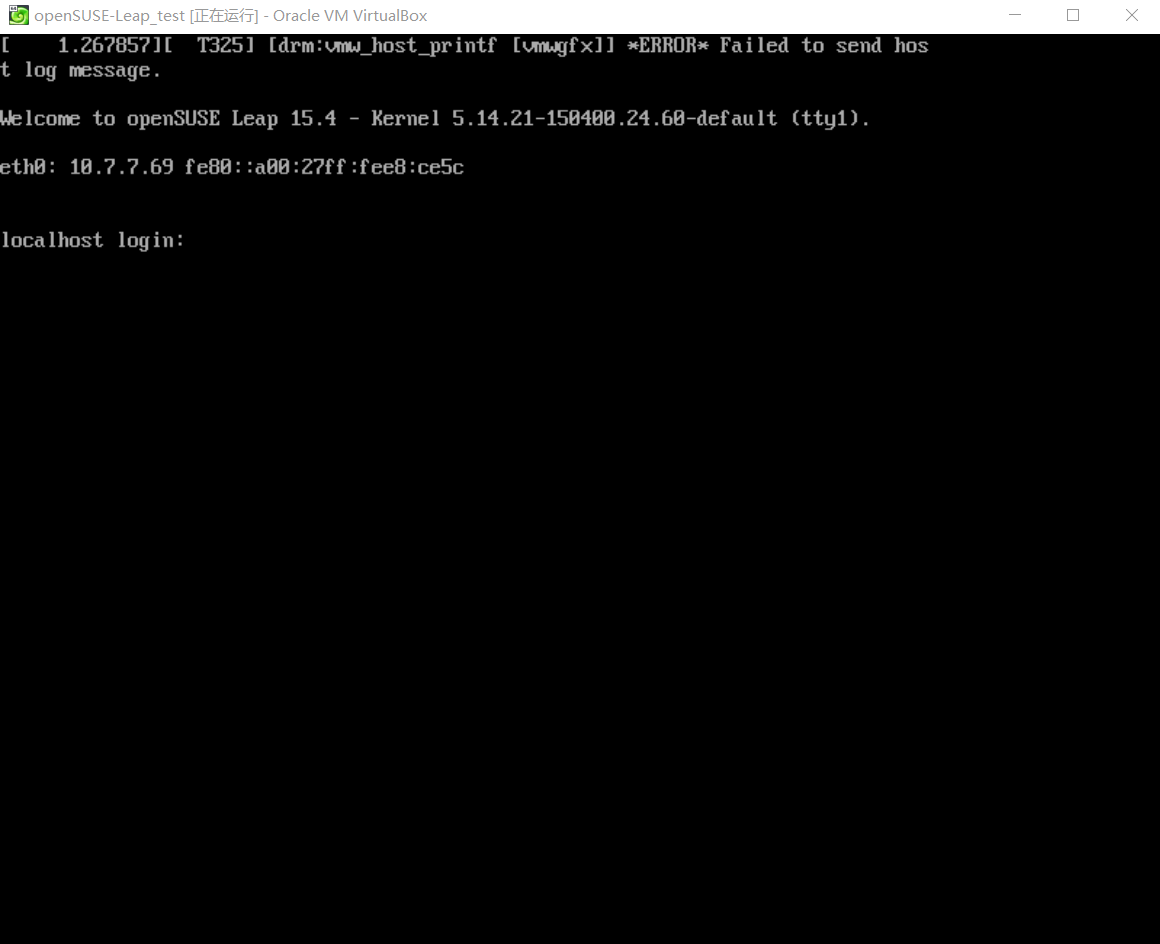
- 正常开机界面
02x02.配置openSUSE
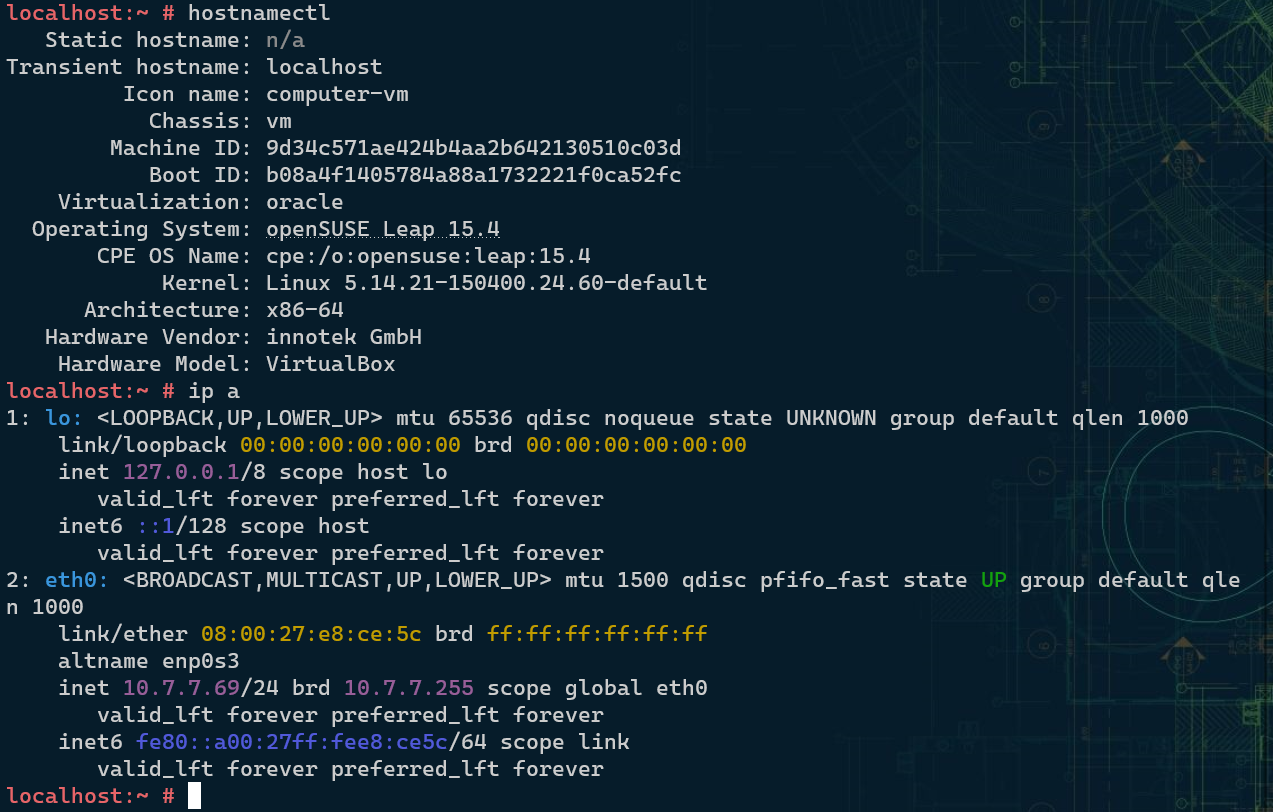
03x01.确认虚拟机能否正常启动
使用SSH工具连接到此虚拟机,确保其工作正常
03x02.添加驱动模块
- 添加virtio驱动模块(确保DD到VPS后能够正常启动)
- 新建 /etc/modules-load.d/virtio.conf 文件
- 添加以下内容
- virtio
- virtiofs
- virtio_blk
- virtio-rng
- virtio_net
- virtio-gpu
- virtio_pci
- virtio_pmem
- virtio_scsi
- virtio_mmio
- virtio_input
- virtio_balloon
- virtio_rpmsg_bus
- 文件看起来是:
localhost:~ # cat /etc/modules-load.d/virtio.conf virtio virtiofs virtio_blk virtio-rng virtio_net virtio-gpu virtio_pci virtio_pmem virtio_scsi virtio_mmio virtio_input virtio_balloon virtio_rpmsg_bus localhost:~ # - 将模块加载至内核
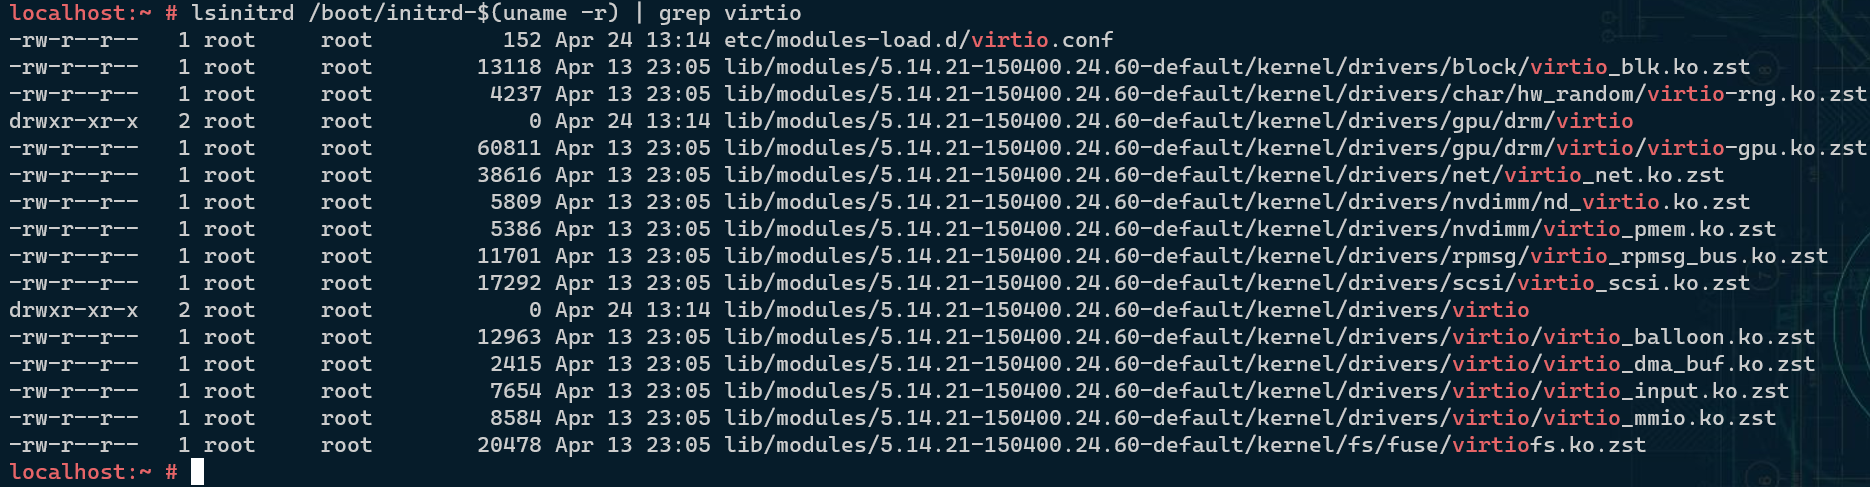
sudo mkinitrd - 确认内核是否添加成功(有回显即可)
lsinitrd /boot/initrd-$(uname -r) | grep virtio回显大致如下所示
03x03.修正eth接口命名
移除接口名称配置文件,以便DD到VPS后自动生成eth0接口,而不是顺延为eth*
/usr/bin/rm -rf /etc/udev/rules.d/70-persistent-net.rules
如果需要安装&配置自定义服务,现在可以开始~
03x04.清除历史命令
history -c
02x03.创建DD包
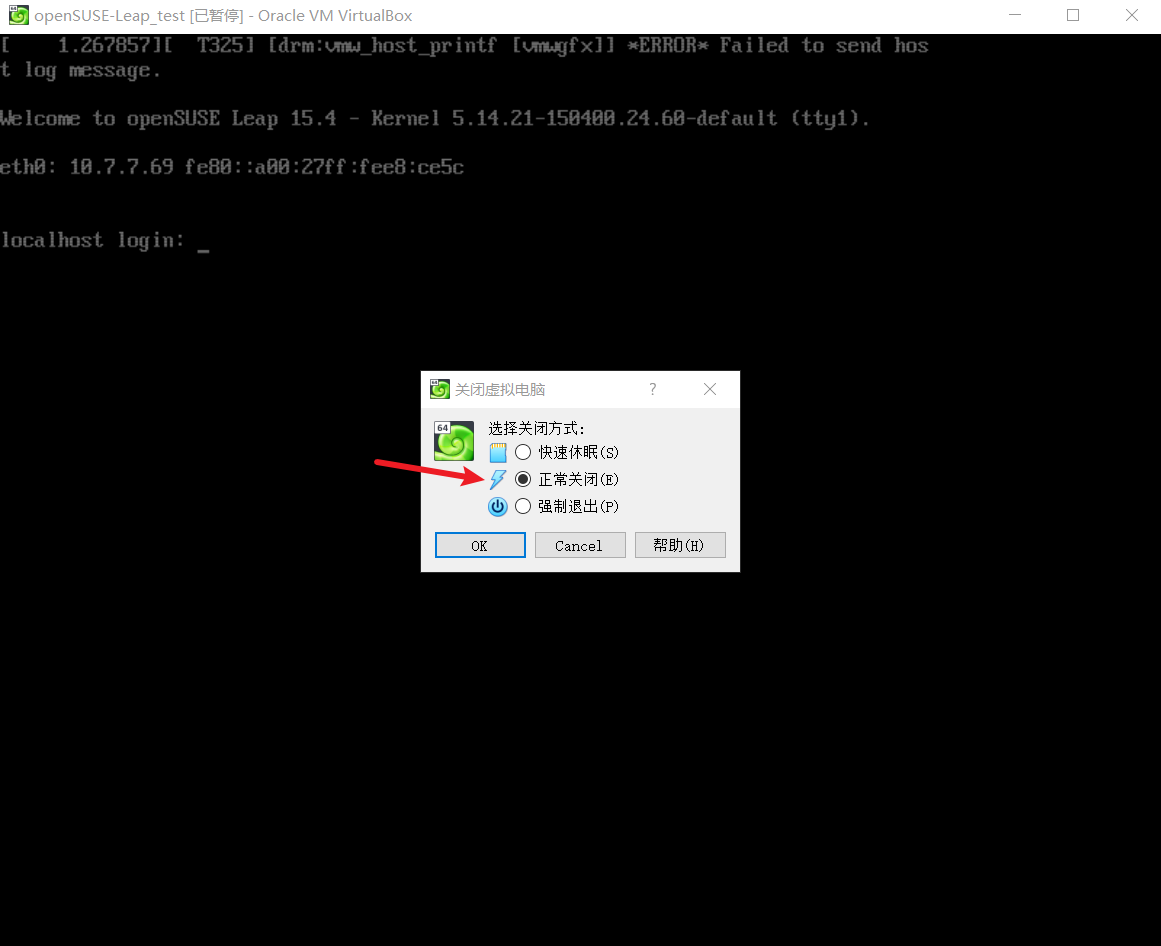
03x01.关闭服务器
从控制台关闭此服务器
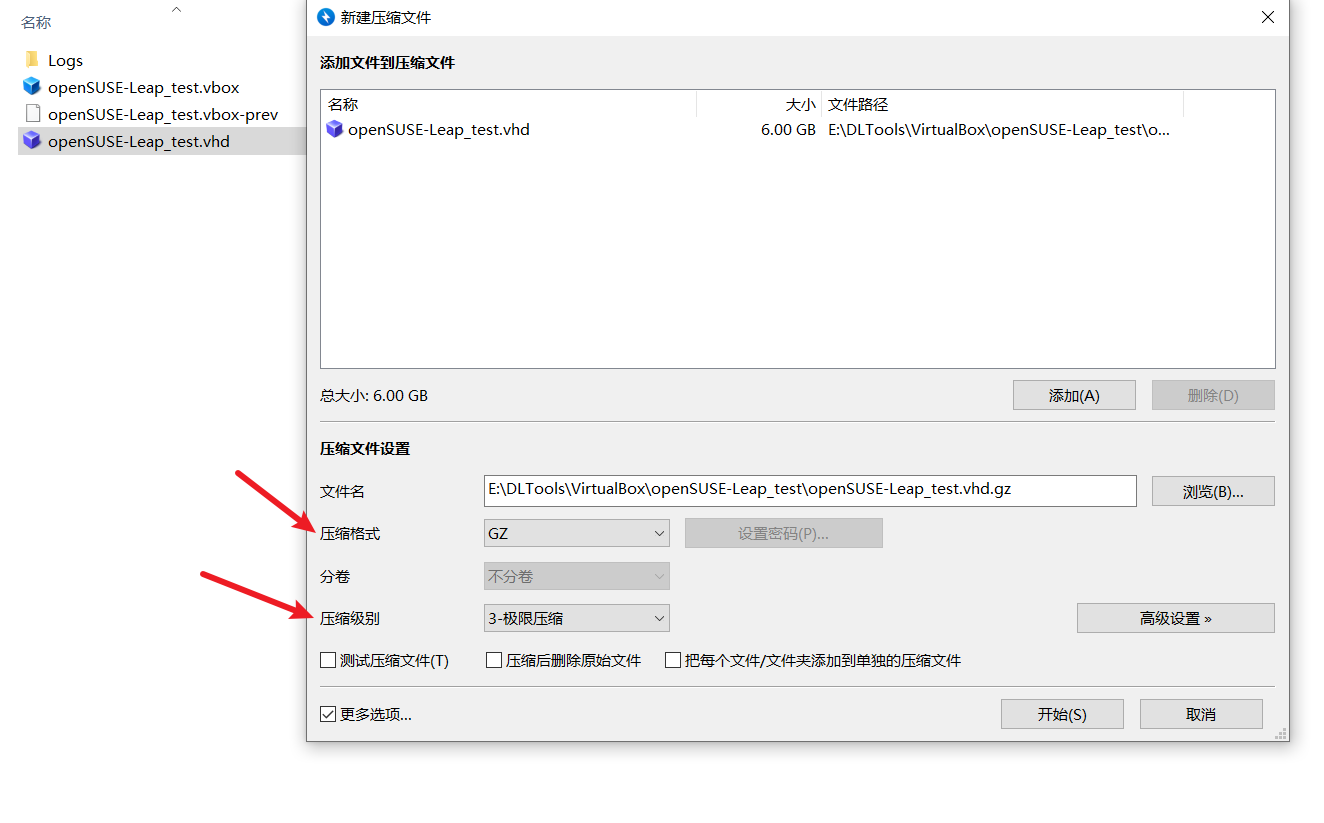
03x02.使用压缩工具将虚拟磁盘文件压缩为GZ压缩包
定位至先前选择目录,找到以vhd结尾的文件,使用压缩工具压缩为GZ格式并选择极限压缩
02x04.测试是否能够DD成功
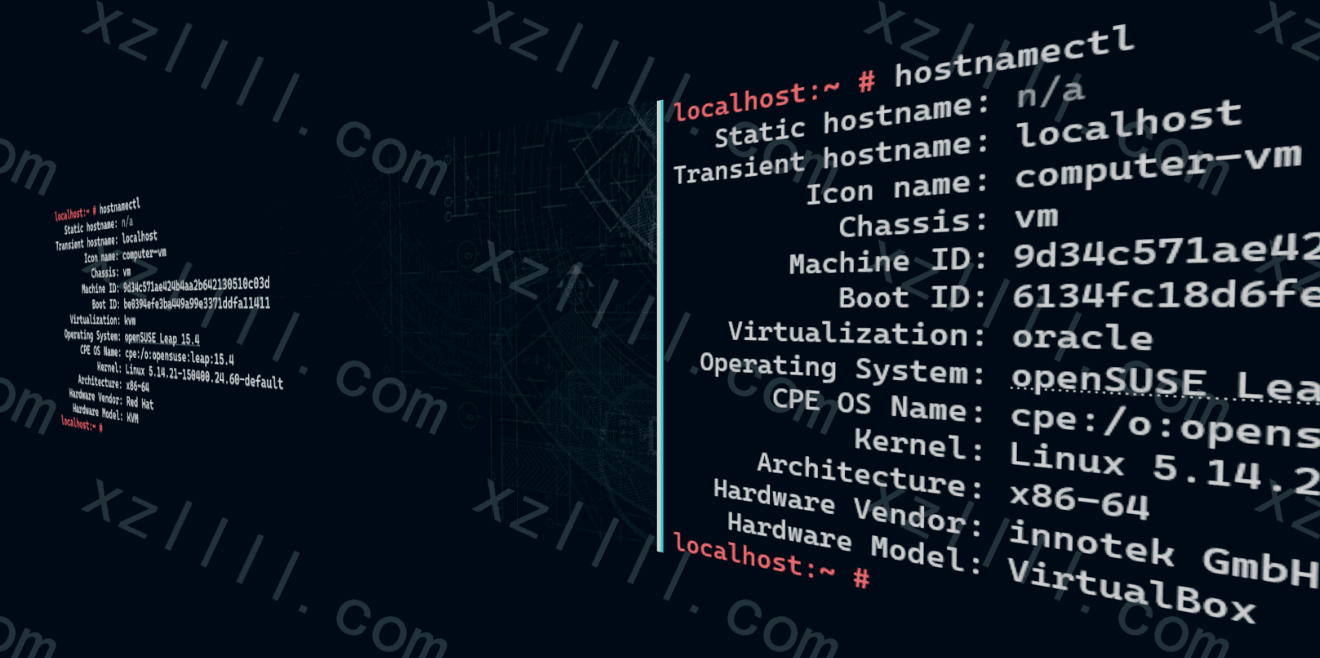
DD完成后截图如下(左为VPS,右为本地VirtualBox)

DD过程就不再赘述了,需要将制作好的GZ文件能够访问(H5ai/miniserve/nginx均可),DD过程中选择自定义文件,并附上URL即可
02x05.DD后扩容磁盘空间
03x01.使用lsblk查看磁盘情况
localhost:~ # lsblk
NAME   MAJ:MIN RM  SIZE RO TYPE MOUNTPOINTS
sr0     11:0    1 1024M  0 rom
vda    253:0    0   15G  0 disk
├─vda1 253:1    0  256M  0 part /boot
└─vda2 253:2    0  5.7G  0 part /
localhost:~ #
可以看到磁盘总量为15G
03x02.使用fdisk重新分区
localhost:~ # fdisk /dev/vda

Welcome to fdisk (util-linux 2.37.2).
Changes will remain in memory only, until you decide to write them.
Be careful before using the write command.

This disk is currently in use - repartitioning is probably a bad idea.
It's recommended to umount all file systems, and swapoff all swap
partitions on this disk.


Command (m for help): p

Disk /dev/vda: 15 GiB, 16106127360 bytes, 31457280 sectors
Units: sectors of 1 * 512 = 512 bytes
Sector size (logical/physical): 512 bytes / 512 bytes
I/O size (minimum/optimal): 512 bytes / 512 bytes
Disklabel type: dos
Disk identifier: 0xffc7e565

Device     Boot  Start      End  Sectors  Size Id Type
/dev/vda1  *      2048   526335   524288  256M ef EFI (FAT-12/16/32)
/dev/vda2       526336 12582911 12056576  5.7G 83 Linux

Command (m for help): d
Partition number (1,2, default 2):

Partition 2 has been deleted.

Command (m for help): p
Disk /dev/vda: 15 GiB, 16106127360 bytes, 31457280 sectors
Units: sectors of 1 * 512 = 512 bytes
Sector size (logical/physical): 512 bytes / 512 bytes
I/O size (minimum/optimal): 512 bytes / 512 bytes
Disklabel type: dos
Disk identifier: 0xffc7e565

Device     Boot Start    End Sectors  Size Id Type
/dev/vda1  *     2048 526335  524288  256M ef EFI (FAT-12/16/32)

Command (m for help): n
Partition type
   p   primary (1 primary, 0 extended, 3 free)
   e   extended (container for logical partitions)
Select (default p): p
Partition number (2-4, default 2):
First sector (526336-31457279, default 526336):
Last sector, +/-sectors or +/-size{K,M,G,T,P} (526336-31457279, default 31457279):

Created a new partition 2 of type 'Linux' and of size 14.7 GiB.
Partition #2 contains a xfs signature.

Do you want to remove the signature? [Y]es/[N]o: N

Command (m for help): p

Disk /dev/vda: 15 GiB, 16106127360 bytes, 31457280 sectors
Units: sectors of 1 * 512 = 512 bytes
Sector size (logical/physical): 512 bytes / 512 bytes
I/O size (minimum/optimal): 512 bytes / 512 bytes
Disklabel type: dos
Disk identifier: 0xffc7e565

Device     Boot  Start      End  Sectors  Size Id Type
/dev/vda1  *      2048   526335   524288  256M ef EFI (FAT-12/16/32)
/dev/vda2       526336 31457279 30930944 14.7G 83 Linux

Command (m for help): w
The partition table has been altered.
Syncing disks
上述操作虽然重建了vda2分区,但不过是调整了vda2分区的Last sector(上述操作为野鸡操作,大概会有风险),也就是说First sector必须与之前未分区前保持一致,上述操作未分区前为/dev/vda2 526336 12582911 12056576 5.7G 83 Linux;分区后为/dev/vda2 526336 31457279 30930944 14.7G 83 Linux;可以看到First sector均为526336
03x03.同步分区表至内核
partprobe
03x04.查看磁盘使用情况及块设备信息
localhost:~ # df -Th
Filesystem     Type      Size  Used Avail Use% Mounted on
devtmpfs       devtmpfs  4.0M     0  4.0M   0% /dev
tmpfs          tmpfs     482M  4.0K  482M   1% /dev/shm
tmpfs          tmpfs     193M  5.6M  187M   3% /run
tmpfs          tmpfs     4.0M     0  4.0M   0% /sys/fs/cgroup
/dev/vda2      xfs       5.8G  2.2G  3.6G  39% /
/dev/vda1      vfat      256M   65M  192M  26% /boot
tmpfs          tmpfs      97M  4.0K   97M   1% /run/user/0
localhost:~ # lsblk
NAME   MAJ:MIN RM  SIZE RO TYPE MOUNTPOINTS
sr0     11:0    1 1024M  0 rom
vda    253:0    0   15G  0 disk
├─vda1 253:1    0  256M  0 part /boot
└─vda2 253:2    0 14.7G  0 part /
此时可以看到分区大小正常,但XFS文件系统还未进行更新,下一步使用xfs_growfs扩容XFS文件系统
03x05.使用xfs_growfs扩容XFS文件系统
xfs_growfs /dev/vda2
回显如下(示例)
meta-data=/dev/vda2              isize=512    agcount=4, agsize=376768 blks
         =                       sectsz=512   attr=2, projid32bit=1
         =                       crc=1        finobt=1, sparse=1, rmapbt=0
         =                       reflink=0    bigtime=0 inobtcount=0
data     =                       bsize=4096   blocks=1507072, imaxpct=25
         =                       sunit=0      swidth=0 blks
naming   =version 2              bsize=4096   ascii-ci=0, ftype=1
log      =internal log           bsize=4096   blocks=2560, version=2
         =                       sectsz=512   sunit=0 blks, lazy-count=1
realtime =none                   extsz=4096   blocks=0, rtextents=0
data blocks changed from 1507072 to 3866368
03x06.查看磁盘使用情况
localhost:~ # df -Th
Filesystem     Type      Size  Used Avail Use% Mounted on
devtmpfs       devtmpfs  4.0M     0  4.0M   0% /dev
tmpfs          tmpfs     482M  4.0K  482M   1% /dev/shm
tmpfs          tmpfs     193M  3.2M  190M   2% /run
tmpfs          tmpfs     4.0M     0  4.0M   0% /sys/fs/cgroup
/dev/vda2      xfs        15G  2.2G   13G  15% /
/dev/vda1      vfat      256M   65M  192M  26% /boot
tmpfs          tmpfs      97M  4.0K   97M   1% /run/user/0
localhost:~ #
02x06.(可选)如果DD后没有网络怎么办?
因为在VirtualBox安装时使用的是DHCP获取的IP地址,若VPS厂商网络域中没有DHCP服务器从而导致无法获取IP地址,可以进行手动配置,openSUSE使用ifcfg-eth*文件来控制IP地址.并使用routes控制网卡(路由),所以我们需要修改这两个文件
- 切换到网络配置目录
cd /etc/sysconfig/network/ - 查看目录下文件(确定网卡名称)
localhost:/etc/sysconfig/network # ll
total 64
-rw-r--r-- 1 root root  9691 Apr 24 13:02 config
-rw-r--r-- 1 root root 15678 Apr 24 13:02 dhcp
drwxr-xr-x 2 root root     6 Mar 15  2022 if-down.d
drwxr-xr-x 2 root root     6 Mar 15  2022 if-up.d
-rw------- 1 root root    46 Apr 24 13:05 ifcfg-eth0
-rw-r--r-- 1 root root    34 Apr 24 13:02 ifcfg-eth0.bak
-rw------- 1 root root   147 Apr 24 13:02 ifcfg-lo
-rw-r--r-- 1 root root 21738 Aug  1  2022 ifcfg.template
drwx------ 2 root root     6 Mar 15  2022 providers
drwxr-xr-x 2 root root    33 Apr 24 13:00 scripts
localhost:/etc/sysconfig/network #
03x01.修改ifcfg-eth0配置
- 原文件
BOOTPROTO='dhcp' STARTMODE='auto' ZONE=public. - 修改后文件(请删除#处注释)
BOOTPROTO='static'
STARTMODE='auto'
IPADDR='1.1.1.1'              #V4地址,此处以1.1.1.1示例
NETMASK='255.255.255.0'       #子网掩码,此处以255.255.255.0(24)示例
03x02.新增routes配置
- 编辑routes
vi routes - 写入以下配置(请删除#处注释)
0.0.0.0/0       1.1.1.1      -      eth0
#目的地址       网关地址             网卡名称
03x03.重载网卡配置
wicked ifreload eth0
因openSUSE默认使用wicked管理网络,若是networkmanger或其他,可以使用systemctl restart network
02x07 更新
03x01 24/08/08更新虚拟机磁盘分区问题
先前04x02中我们创建的分区表为MBR格式,如若你有GPT格式的需求,可以尝试以下分区步骤
目前我们从04x02.磁盘分区的第二项新建分区表往后描述
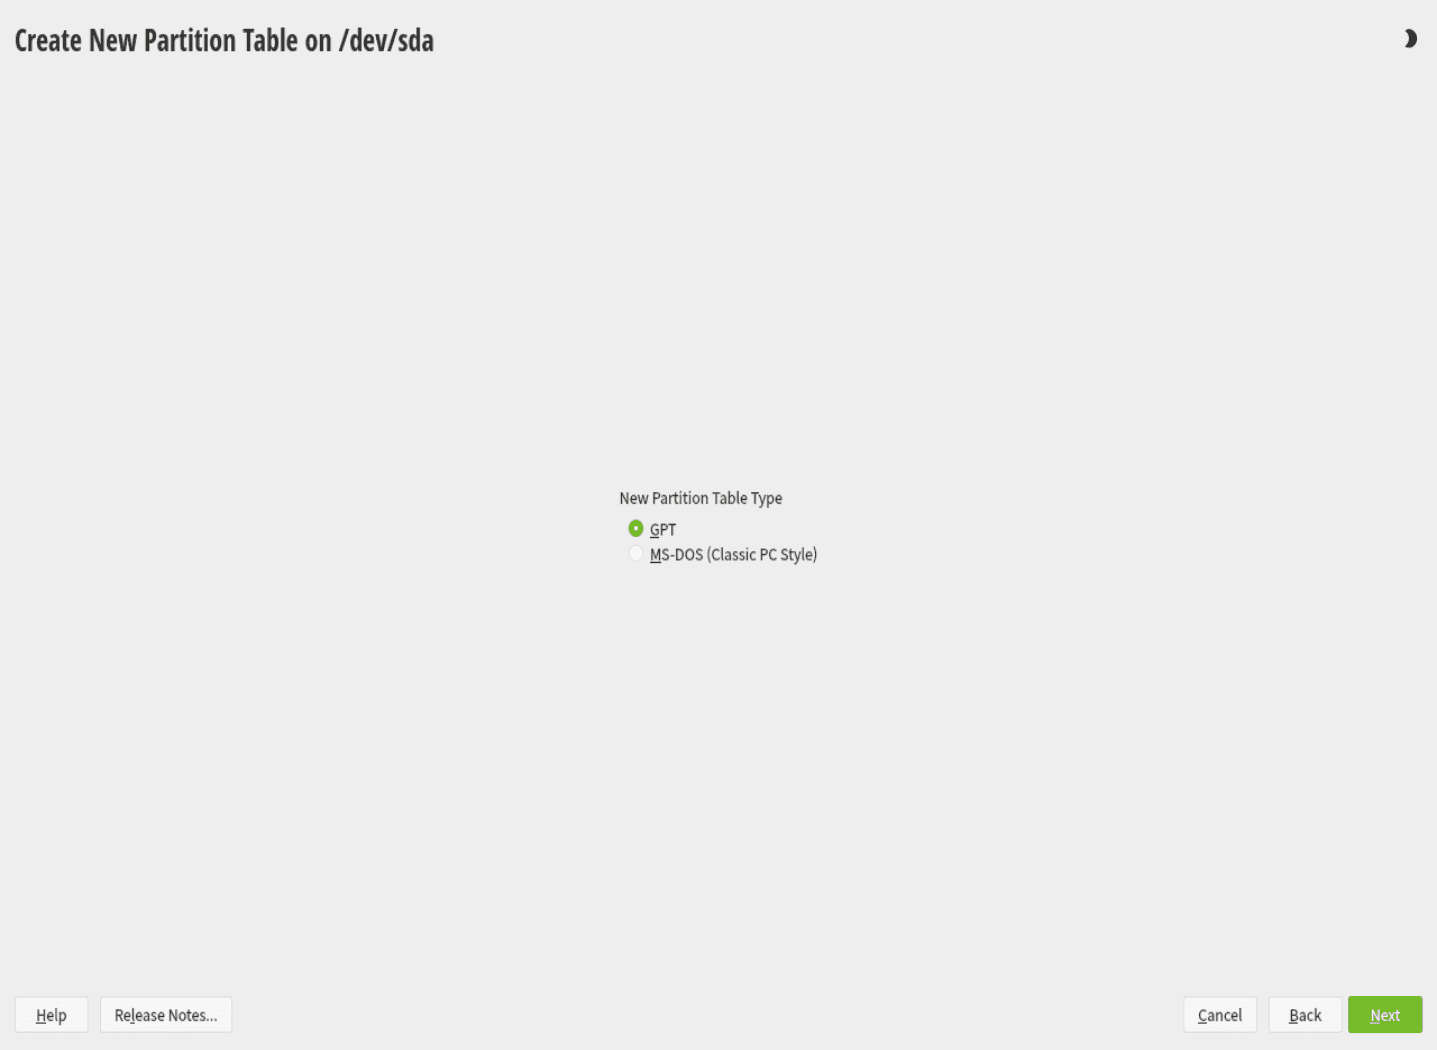
- 这里我们选择新建GPT分区表
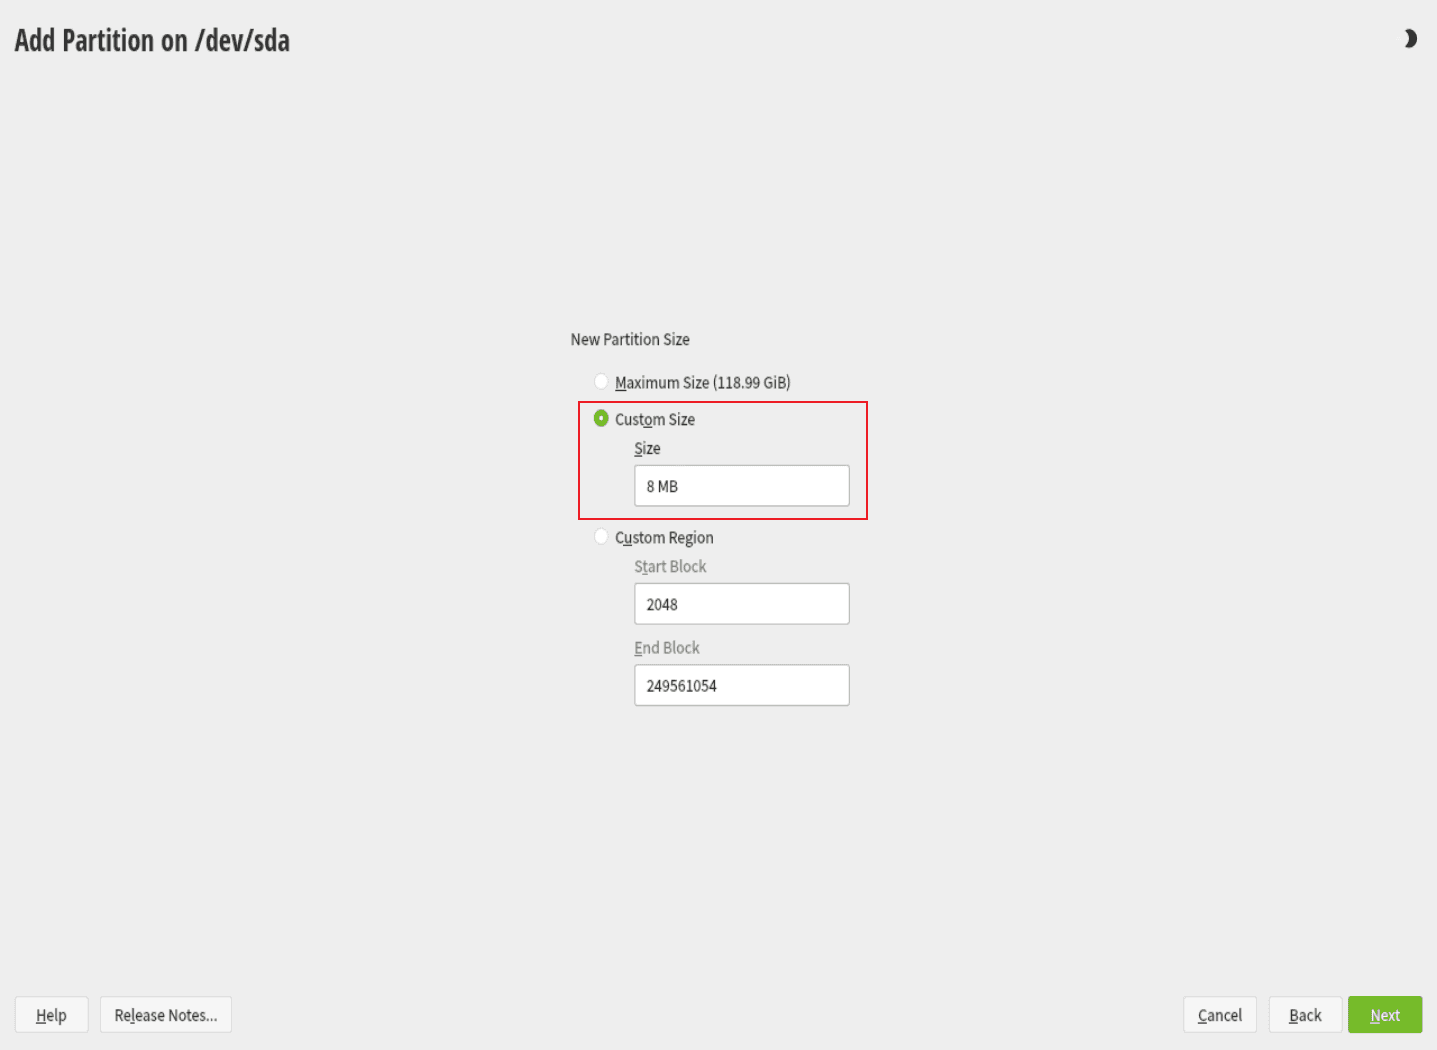
- 接着我们创建第一个分区,将第一个分区的大小自定义为 8 MB
- 选择分区类型为 EFI Boot Partition
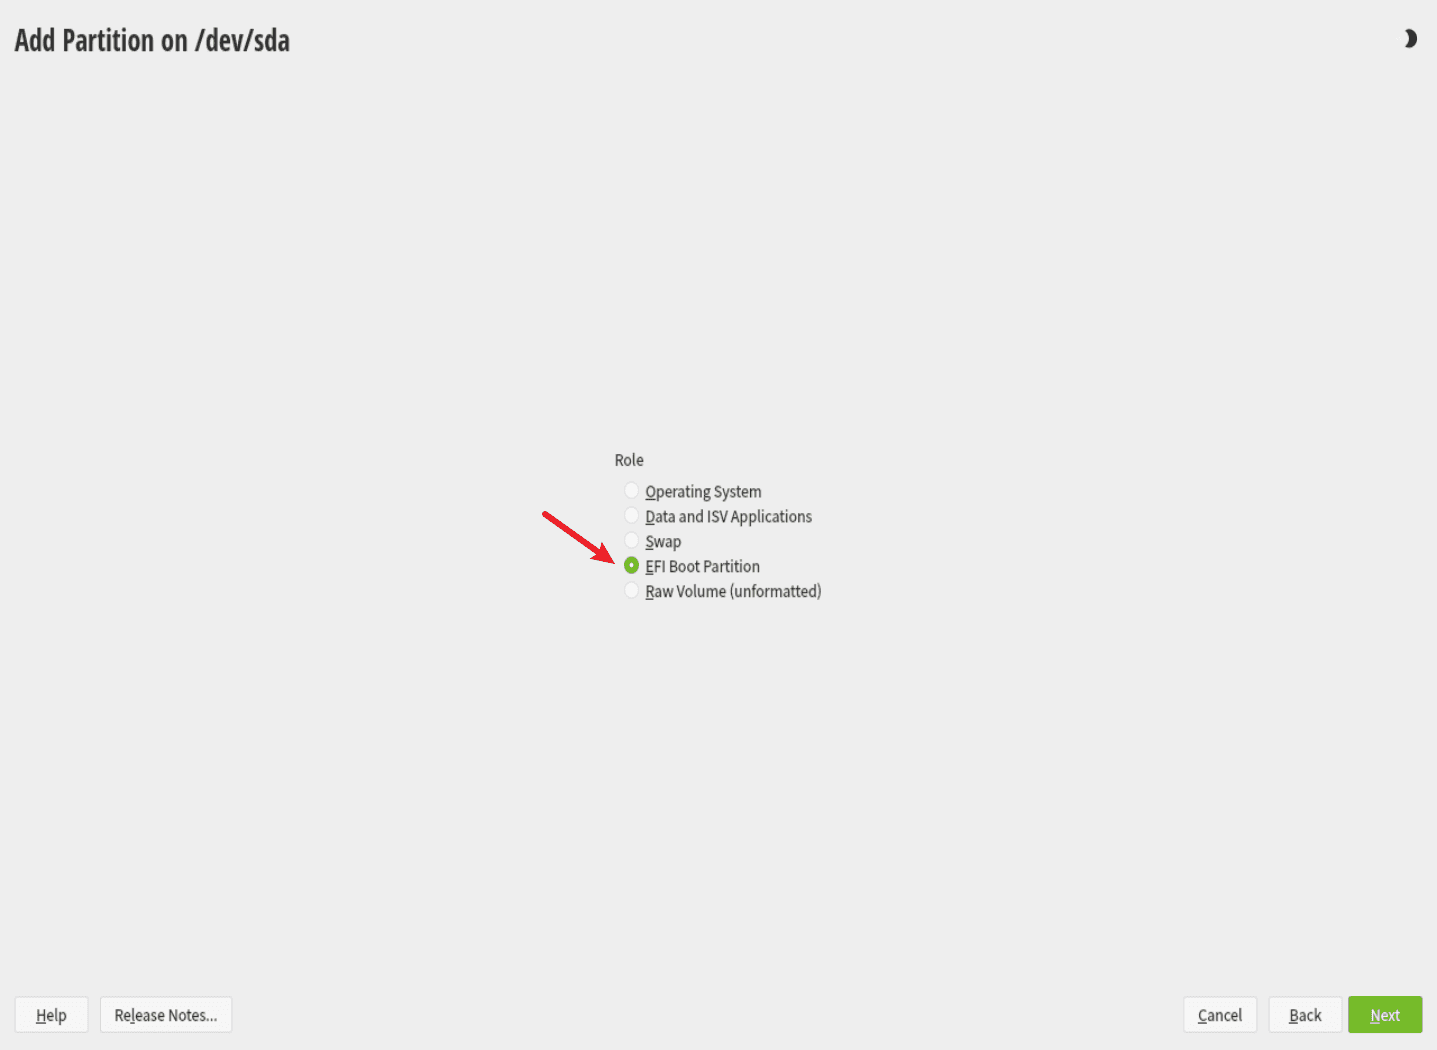
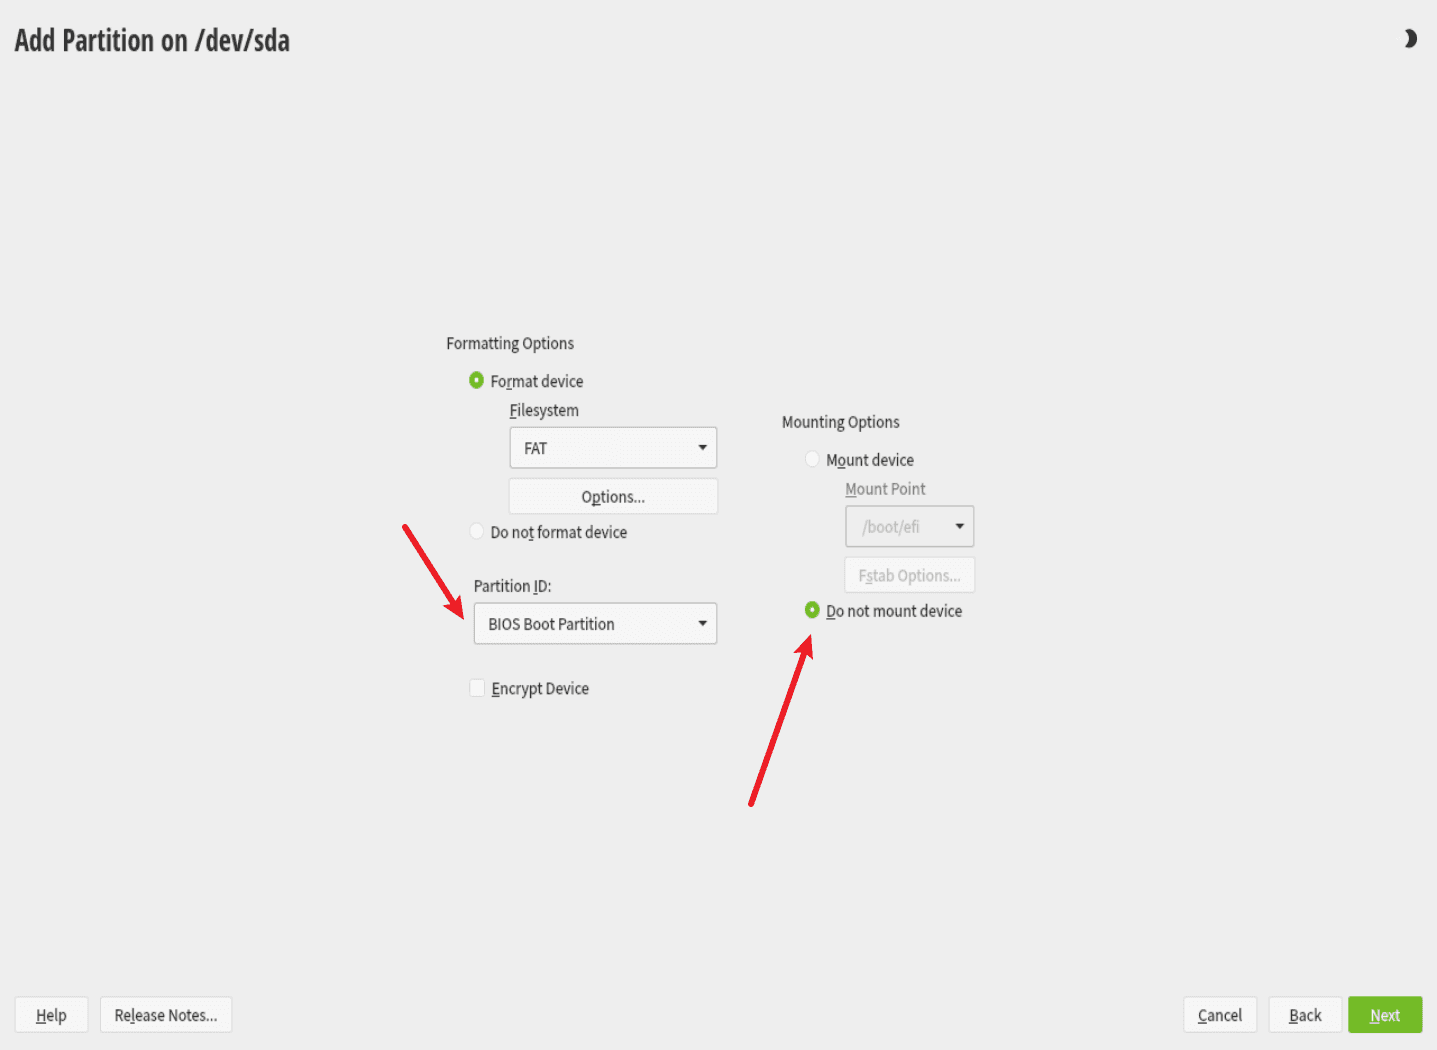
- 将分区ID修改为BIOS Boot Partition并且选择不挂载此分区
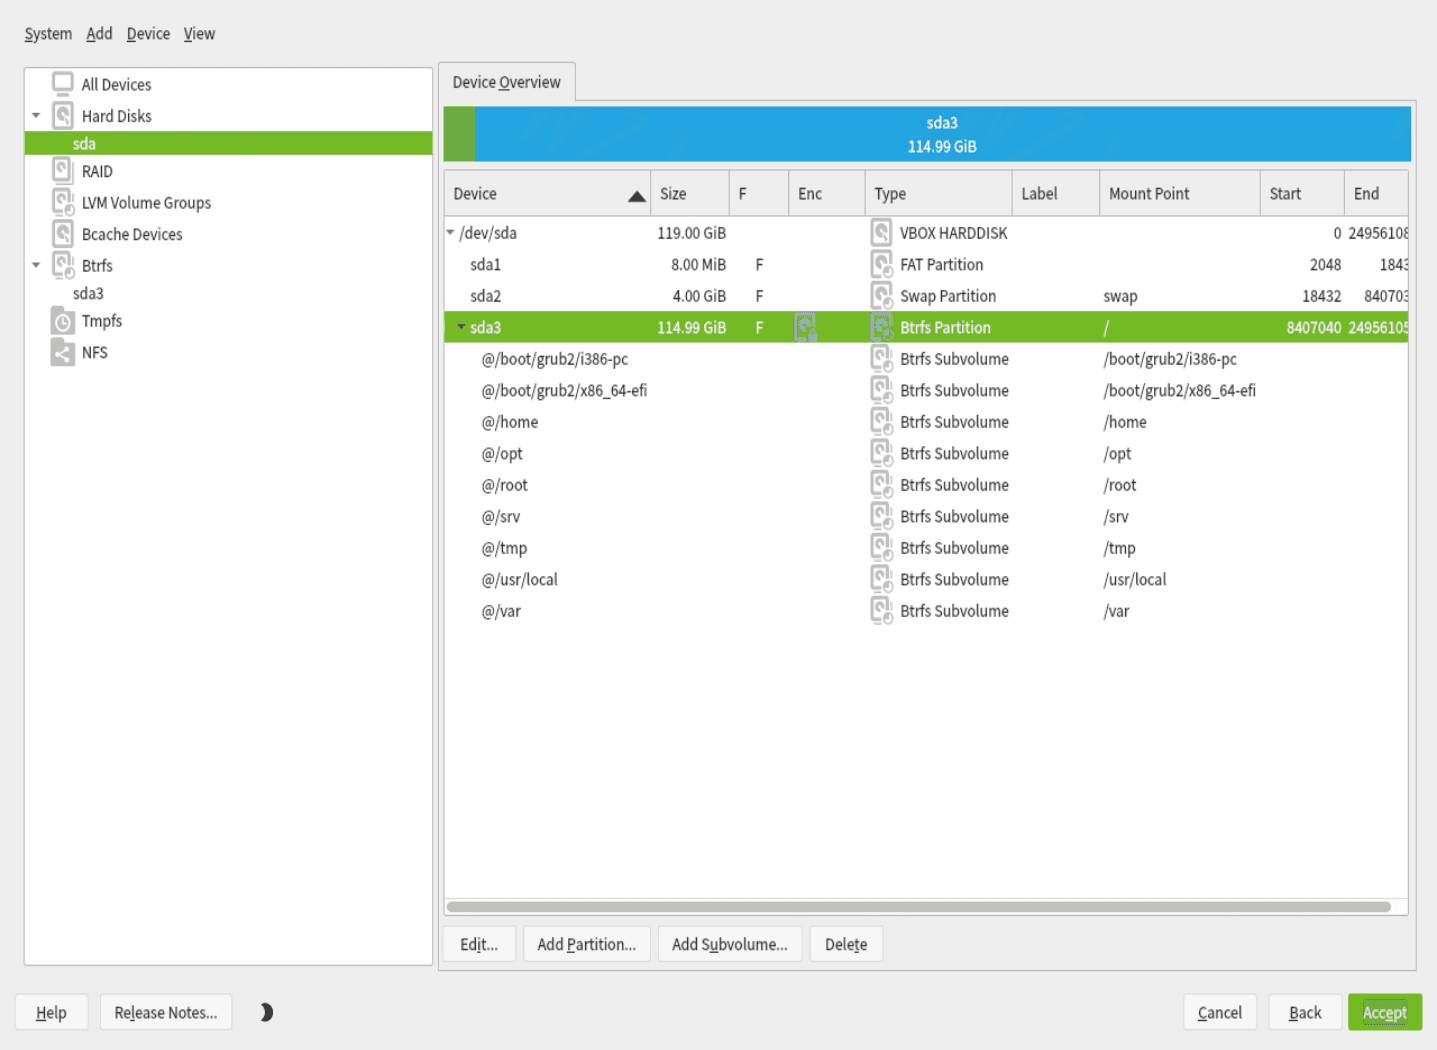
- 整个分区看起来像是如下图所示
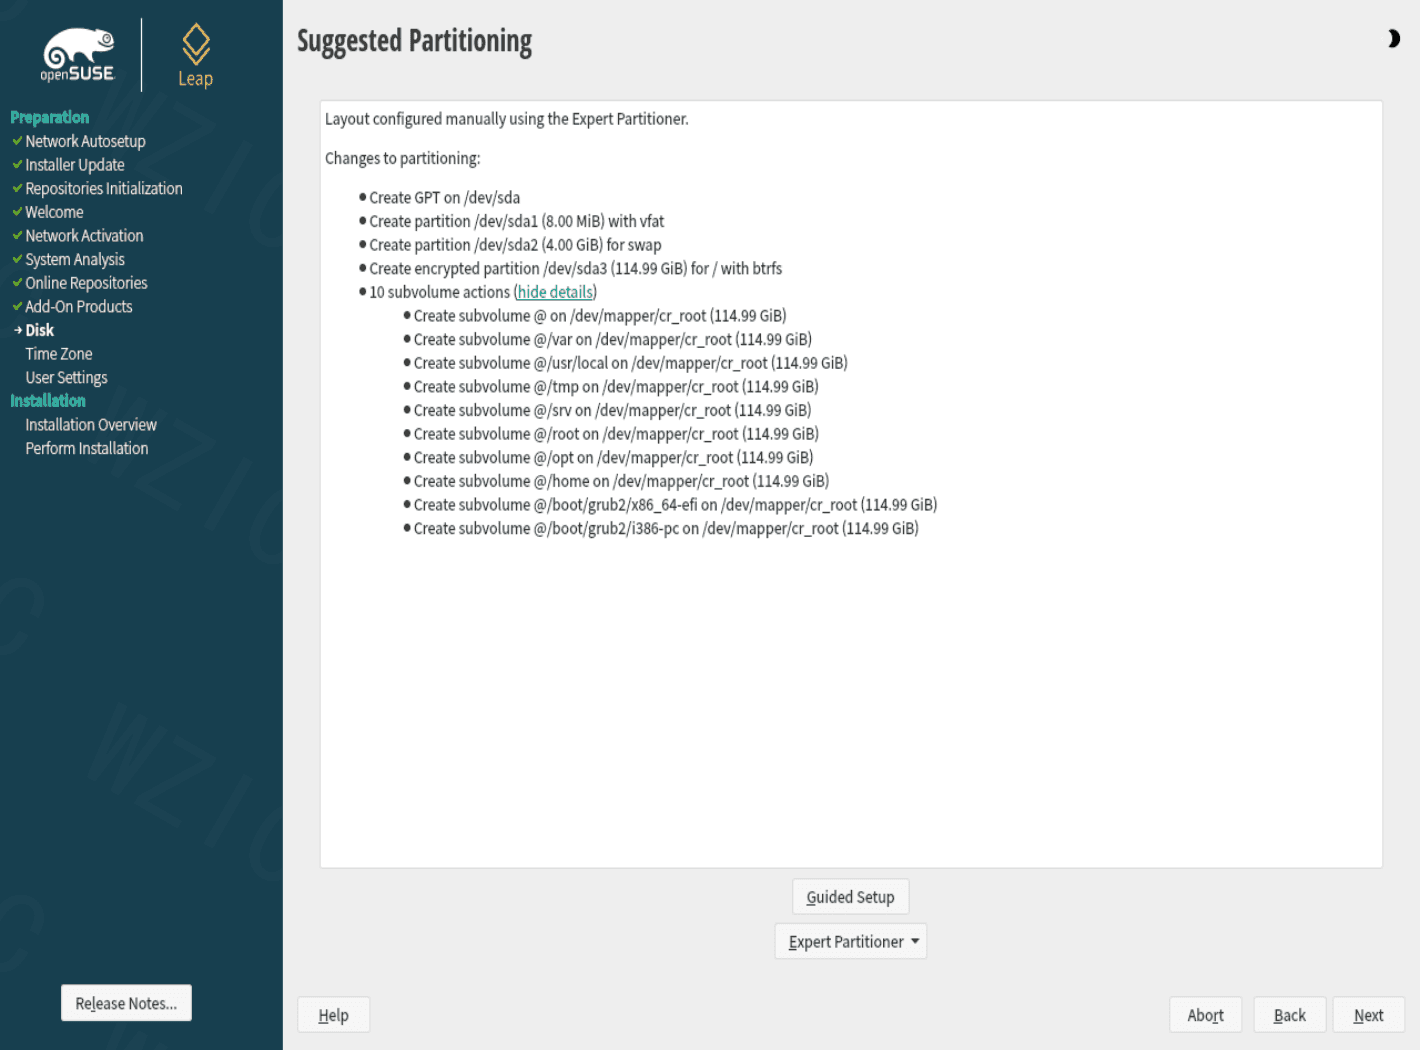
之后按照后续步骤继续进行即可